by Contributed | Jul 8, 2021 | Technology
This article is contributed. See the original author and article here.
Have you ever got your PC to the state where it has all the settings and software installed and configured that you need to use and it’s just in the right state for your daily tasks and then bam something happens, and you need to rebuild or start from scratch with a new PC?
Yip, I’ve been there and it’s always super annoying trying to get your PC back to the state you had it in before. Thankfully, a lot of things are getting better, and you have technology that can sync your settings that can then be pulled down again easily speeding up the rebuild of your PC to the way you like it. But what about the software you like to have installed with that specific version installed that does just what you want?
Well, this is where Windows Package Manager can come into play!
What is it?
Windows Package Manager is an open-source project that Microsoft announced at Build 2020 and version 1.0 was released at Build 2021. It can help you manage and install software onto your machines in an easy and consistent way.
It’s straightforward to get it installed on your machine and start installing software.
Exporting your software list
So how can it help with the initial problem, well the Windows Package Manager has an import and export features that allows you to export a list of software installed on your PC and then use that file to install the same software on another machine. And I might be a bit biased, but I really like this feature, so let me show you how it works.
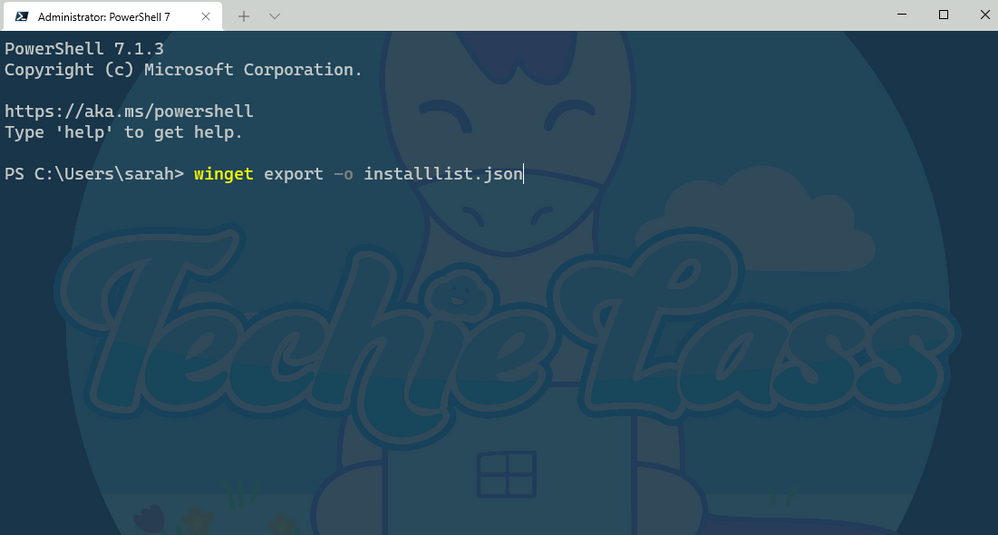
Within Windows Package Manager installed on your machine open your favourite command shell, I like Windows Terminal.
Enter the command:
winget export -o nameoflist.json
This will export a list of software that is installed on your machine to a file location of your choosing. The file will be a JSON file.
Windows Package Manager export command
 Windows Package Manager export list
As you can see from the output file picture above Windows Package Manager lists out each of the software that’s installed.
You do have another option when exporting the list. You can use this command:
winget export -o nameoffile.json –include-versions
 Windows Package Manager export with versions
 Windows Package Manager export list with versions
Now you can see from the output file the file contains the version of software you have as well, so if you have a need for a specific version to be installed and want to take a note of that you can.
Editing the output file
Now what happens if you want a specific version of a specific piece of software, but you don’t care about the versions of the other?
Well, you can edit the output file to suit your needs. As I said earlier it’s a JSON file so can be easily edited within something like Visual Studio Code.
 Windows Package Manager modify export list
Hopefully, you can see from that short clip, that Intellisense within Visual Studio Code is helping to identify where my syntax is wrong, in this case by leaving trailing commas and accidentally deleting quotation marks I need.
Import onto another machine
Now that we have a list of software that we like to have installed, we can start to use this on other machines.
So transfer the JSON file you’ve created to another machine and make sure that you have Windows Package Manager installed.
Now you have the JSON file and Windows Package Manager setup it’s time to use that file to install the software you want, with the versions you prefer.
With the winget import command there are some switches that you can use when importing. You have –ignore-unavailable and –ignore-versions.
The –ignore-unavailable command will continue if any packages are unavailable and the –ignore-versions will ignore any specified versions in the import file and install the latest version instead.
Your needs and wants will depend on how you use those switches. For me I’m going to take my JSON file with listed software and versions and install as per that file with this command:
winget import –import-file installlistversion.json –ignore-unavailable
 Windows Package Manager import command
After a few minutes, the software I want is now installed on that second machine!
Give it a try!
I’d love to hear how you are using this feature in your environment or if you have any feedback after using it!
by Contributed | Jul 7, 2021 | Technology
This article is contributed. See the original author and article here.
Idea
When not coding and building IoT project I spend time working on a personal project or building an aircraft, and to be more specific a
South African designed Sling TSi.
The design of the aircraft is widely regarded in Light Aircraft circles as being one of the best 4-seat aircraft out there for the home builder and one of the main reasons I picked the design, now I know what you’re thinking have I opened the wrong blog post here what’s all this Airplane speak…
Well, there is an issue with the Factory shipping the kits around the world and that is that they struggle to get the trained staff due to Covid issues and thus kits are being shipped with incorrect parts or 2 left parts when there should be a left and a right for example. My idea is that I have this awesome Percept device I have been loaned from Microsoft to write some blog posts and have a play with and I got to thinking could I train it to recognize the parts and show the tagged name of the part so that an untrained shipping agent in the factory could us it to make sure the kits has all the correct parts?
Let have a play and see shall we…
Where do we start?
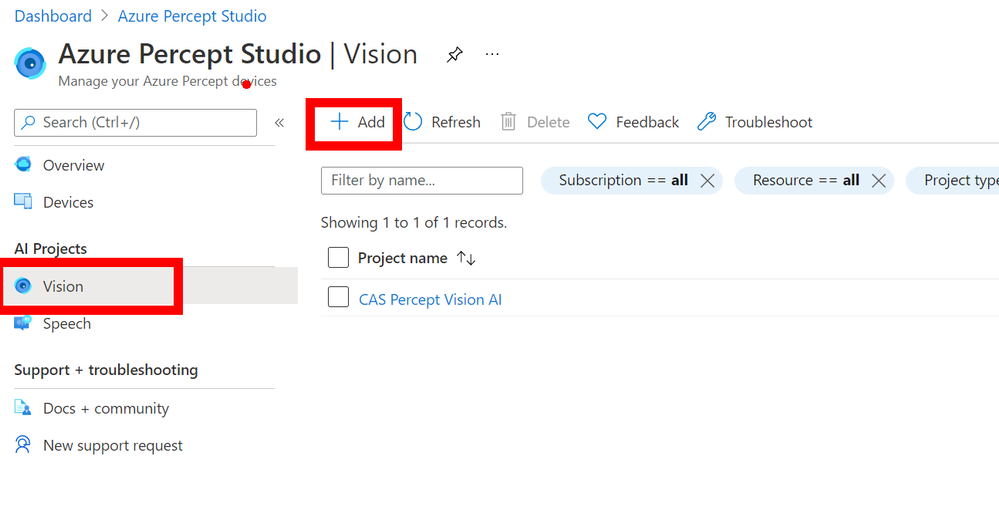
We start in the
Azure Portal and more specifically the
Azure Percept Studio where we can access the Vision Blade of the Percept Device. In here click the `ADD` button at the top to add a new Vision Project.
In the new blade you can fill in the boxes by giving the new Vision Model a name and a nice description (For when you or a college comes back in a few months and wonder what this is!), then you can make sure you have `Object Detection` selected and `Accurancy` and you can then click `Create` at the bottom of the page.

Image Capture
Next we move onto the Image capture that is then used to train the model with our first parts, so make sure you have the correct device selected and tick the `Automatic image capture` checkbox and the drop-down lists will appear where you can select the setting needed. As this is just the first images of the first component I want to capture to test everything is working I have set mine to be `1 Frame every 5 seconds` and `Target` to 25 this means that the Percept will take a photo every 5 seconds until it has taken 25 photo’s. These images will then all be loaded into the AI model ready to be tagged and trained.

Small issue is that you don’t really know when the images are being taken and when it has started… So if you click the `View Device Stream` just above the Automatic Image Capture you will see what the Percept-EYE can see and watch as the images are taken.
The alternative if you have enough hands is to NOT tick the `Automatic Image Capture` in which case the button bottom left will say `Take Photo` and this will take a single photo. However I find I need more hands than I have, but this would be good if the Percept is right next to you on your desk but not so good it’s on the factory floor.
Custom Vision
Now we have the images and yes I know there is not really any feedback with this method of training it would be nice if the Stream Video in the browser had a border that flashed up with a colour or something when an Image was captured so you knew what was happening but hey ho with work with what we have.
Now if you click the next button you can go to what looks like a pointless page but stick with us there is a reason for this, but click the `Open project in custom vision` link in the centre of the page, this will open the customer vision project and there will be a few agree boxes to check on the way but then you should have your project open.

As you can see there are 2 projects in my Custom Vision and the left one is the new one we just created with me holding one of the Aircraft Horizontal Stabilizer Ribs which goes on the front of the Horizontal Stabilizer. Click the project to open it and lets look at the images we managed to grab.

Tagging the Images
You will look and at first (Like me!) wonder where all those images went but don’t panic they are just `Untagged` so on the left menu click the Untagged button to view them all.

Clean up the images
First I like to go through the images and remove all the either poor quality or clearly nothing to see here images, you can do this by hovering over the bottom right of the image, you will see a white tick appear for you to click. Once clicked it turns blue to show it’s selected repeat for all the images you want to remove. Once complete at the top of the page is a `Delete` button that will delete them all for you.

The next part is sadly rather laborious and boring so I hope you have a fresh cup of
IoTLive as this can take a while.
So select the image and then using you mouse hover over the part you are interested in within the image and you hopefully should see a bounding box around it to select. Once selected you will see a Text Entry appear so that you can give it a Tag name, this name will be what is shown when the Percept views this part and decides to show the tag name on the screen as part of look what I found bounding box, so pick a good name. As I am tagging aircraft parts I am giving them the Aircraft Component reference from the drawings.
If you don’t get a bounding box on the part you want to select just Left mouse click and draw your own box.

As you move to the next image using the Arrow to the right of the modal box on the screen the next image will appear and it’s just a repeat of the process, however when you select the next area to tag the previous Tag names will appear so it’s quicker to just click along through the images.
When you have tagged all the images click the close `X` top right, you will see that you now don’t have any untagged images so select the `Tagged` button so that you can see them all again.

Now this is Important
You need a minimum of 15 images for each tag, in my case I only managed to capture 12 so I was a few short, so remember when I said before that the Azure Portal seemed to leave you hanging with that pointless page to select `Custom Vision` well this is where you need that.
Go back to that browser tab (You didn’t close it did you!) and then you can click the `Previous` button bottom left and again select another `Automatic Image Capture`. This seems tedious but it’s the quickest and easiest way I have found to grab all the images in the correct format and sizes etc and upload them into the Custom Vision Project.
So take another batch of images of that component and repeat the tagging process, 15 is the minimum number need for the training to take place ideally you want 30-40+ of each part/object from many directions in many lighting levels etc…
Training
Now you have more than 15 images hopefully closer to if not more than 40 images you can train your model, so there is a nice compelling big green `Train` button at the top of the screen. Give it a click and you will be asked what type of training I normally always select `Quick` and then go refresh that Cup<T> as this part takes a few minutes.

Once it’s trained you should see a nice page with lots of high percentages like below, but don’t be fooled it’s not really 100% accurate but we can test it and see how good it really is.

Testing
Like all good developers we like to test and this is no different, so at the top of the page click the `Quick Test` button.

Sadly you do need to grab an image that is not already used so in this case I just use my Mobile phone to take an image and then copy to my PC using the awesome `Your Phone` feature in Windows or if you still have the browser tab open with the `Webstream` from the Percept you can do a screen clip from that browser. Only downside is that the bounding boxes from you as a Person may be over the image hence me preferring to using my mobile phone.
As you can see when you give it an image it will show bounding boxes and the prediction rates for those boxes, you can use the slide to change the `Threshold` value so that you can hide the noise if there is any.

For a 2nd attempt with some noise in the background you can see that I had to move the slider all the way down and it was only 9.5% probability that it could identify the Rib, so this means the test has proven that more images are required and more training.

Iterate and Improve
The process is very simple to set-up and train a customer vision model with the Azure Percept, and as you can see with a component from the aircraft on the very first training run it was fairly good with the white background but poor with all the noise.
So I went on and spent some time training with even more photos and even added in the next RIB along in the build so there were 2 parts similar.
However now that you have a trained model that is improving when you take the images and your tagging them you will see at the top of the Tagging Dialog a slider for `Suggested Objects On` if you turn this on and give it a second or two it should find your object and bounding box it with a big blue `Confirm Suggested Objects` button to click. If this doesn’t work repeat the old way of selecting or drawing the bounding box until it has learned enough.
The advantage of using the suggested was is that you can creep the slider up and it’s a form of testing for the images and the Model as well, so you can see it improving over time.

When you have tags a lot more images and you are confident you have a good selection you can improve the trained model by giving it more resources and more time to learn. You do this by selecting `Advance Training` after clicking the Green train button, this will open the dialog some more and show you a slider where you can allocate the time you wish to train the model for and even have it send you an email when it’s done.

Final step
Now that we have a model that we have Trained, Tested and Iterated with to a point that we feel comfortable sending down to the Edge and using in Production we can go back to the Azure Portal and Percept Studio Page to finish things off.
The last Tab is for `Evaluate and Deploy` and it’s here that we send the model to the device so that it can be used without the connection to Azure, yes that’s right it can work away at the Edge even with a slow or non-existent connection.
Just select the Device and the Iteration of the Trained model you wish to use and then tap `Deploy` once that is done you can open the Web stream to the device and you will notice that there will be a message for a minute or two on the first load where it shows `Loading Model` after this it will show live tagged images when you hold the parts in front of the camera.

Results
You will see that when I am holding a Part in front of the Percept camera it is correctly identifying the part and the last 3 digits are it’s confidence that it’s found the correct part and as you can see with just 35 and 58 images of the two parts I trained it’s already very impressive, but for production you would want more images in different lighting levels etc.

Conclusion
Building this blog and training the models took a few hours but most of that was off doing something else while the training system worked away, if I’m honest I probably only spent maybe an hour actually working on it and have some very impressive results.
Also now you have a trained model it’s not restricted to the Percept devices, you can download the model and use it elsewhere like maybe a Xamarin/MAUI app on a mobile device so that engineers out in the field can have the Parts Checker with them the uses become endless. If you want to read more about this there is a fantastic guest
Blog Post by Daniel Hindrikes and Jayme Singleton that’s well worth a look.
I do hope you enjoyed this long walk through all the set-ups to using the Percept Vision system and enjoy playing with you Vision Models, if you have any questions just reach out on Twitter or LinkedIn.
Happy Coding, I’m off back to building the Sling.
Cliff.
![[Amplifying Black Voices] Lifting as you climb: The Art of Evolution](https://www.drware.com/wp-content/uploads/2021/07/fb_image-16.jpeg)
by Contributed | Jul 7, 2021 | Technology
This article is contributed. See the original author and article here.
Every day when I wake up, I feel gratitude because I am able to lift as I climb and inspire others. Growing up in the small rural community of Georgetown, South Carolina I learned that nothing in life comes easy and to get things done, hard work, integrity, and focus would be critical. I knew leaving my hometown to attend North Carolina A&T State University was the biggest opportunity for me to change the narrative for not only myself, but for my family. If not me, then who? This was my chance to show the world who I am and what I could be capable of.
While attending North Carolina A&T, a Historically Black College & University (HBCU), I was fortunate to be actively involved in student life and leadership starting my freshman and sophomore year. I was the official student ambassador, elected as the 8th Mister North Carolina A&T, representing over 11,000 students my senior year. During this year, I had the opportunity to meet with President Barack Obama and lead a community forum with Facebook CEO, Mark Zuckerberg. My HBCU equipped and exposed me to opportunities that prepared me for the real world and for my upcoming journey at Microsoft.

Leading up to graduation, I knew how important the next few months of my life would be. It seemed like every upcoming decision had major implications on how my career would begin. As I evaluated my potential employment opportunities, I started to look at the details of what mattered the most to me in terms of career and personal development.
Career: I knew I wanted to work for a company whose mission truly stuck with me, created a culture of diversity and inclusion, and would provide me with the support to make an impact outside of my day to day work.
Personal Development: I knew I wanted to be in an environment where I could continue to add to my skill set, learn from those around me and build my network to help mold me into a more valuable asset.
With these things in mind, I took my experiences and perspective to Microsoft. Empower every person and every organization on the planet to achieve more. There was just something different about Microsoft’s mission statement that motivated me from the day I accepted my offer, this is where I belonged.
As a first-generation college graduate, earning a B.S. in Industrial & Systems Engineering from North Carolina A&T State University, and working at one of the top tech companies in the world for the past four years is the biggest and most significant accomplishment for me and my family.

I started my career the summer of 2017 with Microsoft as a Channel Operations Manager fresh out of college. I remember my first year at Microsoft supporting the Xbox One X launch. The feeling of being a part of something bigger than myself was gratifying and fulfilling. Working tirelessly with my team through tough challenges to release the final product was exhilarating and allowed me to work on a project that had global impact.
I always hoped that one day I would be able to break generational curses and pave the way to create opportunities for others behind me. I live by the motto “tough times never last, tough people do.” Despite your circumstances, with hard work and determination, you can achieve the impossible and exceed expectations. I feel the weight of the world everyday as a young Black male, but I have learned to always focus on the positive and persevere. I’m living proof that is possible to come from an under resourced and under privileged community and reach new heights.
Currently, I am in my 2nd role as a Strategic Sourcing Manager II in Microsoft Devices supporting all hardware products.

Let’s lift each other up as we climb and realize our impact.


Recent Comments