Video Transcript:
– Up next, we’re joined by engineering leader, Kamal Janardhan to go deeper on Microsoft Viva Insights. We’re going to show you how it delivers data-driven privacy protected insights and recommended actions to help individuals and their teams improve their productivity and wellbeing, and your options for configuration. So Kamal, welcome back to Microsoft Mechanics.
– Thanks Jeremy. It’s great to be back on the show.
– And thanks so much for joining us today. So of course, before we get into Viva Insights, if you’re new to Microsoft Viva, it comprises four modules, with more to come, that deliver new employee experiences across knowledge, communications, learning, and insights, all in the flow of your work. Now, these leverage foundational technologies of Microsoft 365, Microsoft Graph, and AI to deliver a modern employee experience platform. In fact, you can learn more by watching our Essentials episode at aka.ms/VivaEssentials. Now, one of the foundational experiences in the new Viva platform is Viva Insights. So Kamal, can you explain what’s behind it?
– Glad to. So when the pandemic hit, it was a shock to all of us. And as we were developing the Viva Insights experience, we looked really closely at the impact of that shift. In fact, we recently published a work trend index report, which was based on a study of 30,000 employees across the world in 31 different countries. And that surfaced a few key learnings. First, that flexible work is here to stay. People want to be able to work anywhere, and this helps their productivity. Next, as we work remotely, it is harder for leaders and managers to stay in touch with their teams. And lastly, as a workforce overall, we’re all exhausted. In fact, our time spent in meetings has more than doubled.
– Right, I’ve got to say, I think these are all very relatable insights, both as individuals or as managers.
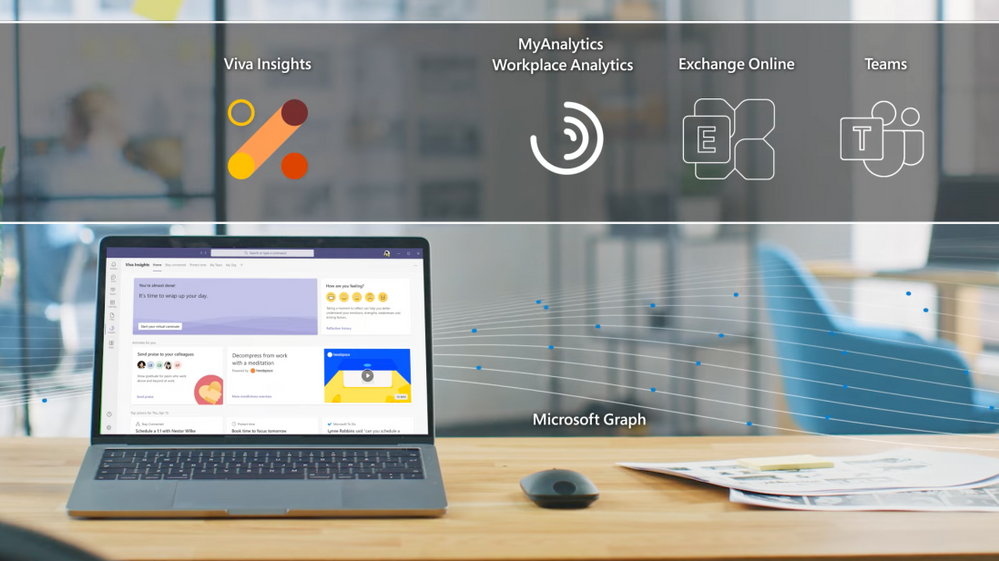
– Yes, because hybrid work at home and in the office is the new normal. We want to give individuals, managers, and leaders, the insight to develop healthier work habits and a better work environment. Viva Insights, as part of that employee engagement platform, is our intelligent experience designed to leverage MyAnalytics, Workplace Analytics, and Exchange Online to deliver these data-driven, privacy-protected insights that recommend actions to help prioritize well-being and productivity. For example, as an individual, I get personalized reminders to book focus time or to take regular mental breaks. Then, as a manager and a leader, Viva Insights gives me granular visibility into work patterns that can help me detect trends like burnout, so that I can stay more connected with my team and minimize attrition.
– Okay, so I think for many of the people watching the personal insights available to you as an individual will be familiar. That said, Viva Insights goes above and beyond what you may be used to, especially with Microsoft Teams integration and new employee experiences and those integrations with wellbeing partners, as well.
– It does, and given how much time we all spend in Teams, that’s essential. So let’s dive into the experience. Here, as you can see, I’ve already installed and pinned Viva Insights to my left navigation. In my home tab, I see a time of day greeting on the upper left. With all of us online so much, bringing a human face to these experiences is important. First, I’d like to highlight our brand new integration with Headspace. Now all the research tells us that cognitive breathers are essential to get work done. This capability brings in a curated set of guided meditations that help you relax your mind, like the one you can see here called Body Scan. And I can click through to find more meditation mindfulness exercises. These are short,bite-sized guided meditations that you can integrate into your routine, perhaps before the start of an important meeting, or as a quick break between back-to-back meetings, or to help you unwind at the end of your day. Now back to the home tab on the upper right, there’s a Reflections tab that encourages me to pause and tune in to how I am feeling. We know that taking a moment to reflect can improve emotional resilience. I’m feeling good, so I’ll click on a smiley face. And I also see that my reflection history over time is available to me through a view that is completely private. From here, I can set a reminder to make this a habit. I’ll keep the default at 4:00 p.m., but I can then see this over time and evaluate what I need to change about my routine. If I go back to the home tab, you also see that we’re aiming to create a more positive team culture. In the hybrid world, I can reach out to my coworkers and we know that when people feel isolated, we see as much as a 70% drop in reported productivity. Recognizing each other’s work through something like praise, like I am doing with Adele, goes a long way to bridging that distance. I can also send this to the Teams channel with a note, so everyone on the team sees this, and I can model the culture that I want to see in my team. Moving on to the Stay Connected tab, we’ve also made it easier for you to stay in touch with your colleagues. Here, you can do that by prioritizing time for regular one-on-one meetings with them, keeping up with their asks that are distributed across email chats and have all of them grouped into a single place, according to the relationships that matter.
– Right, and all this really helps in terms of making sure that you do what you’ve committed to doing.
– That’s right. Viva Insights aspires to help you manage your time and your mental energy by surfacing what is most important and helping you keep track of it. Now, protecting your time, we found, requires intentional action, because remote work often drives us to accept more meetings than normal because of a fear of missing out, FOMO. In the Protect Time tab, I can see my free slots and I can schedule my focus time to work uninterrupted on work that matters. In fact, when you book focus time, your Teams chats are muted to help you concentrate to pay yourself first. And later this year, we’ll be introducing a new focus mode, the features additional music from Headspace. Let me give you a first look at that new experience. Here, I can focus on my first task and I send a financial analysis to all my leads. After I’ve completed that task and hit the 25-minute mark, it prompts me to take a five-minute break. Then I can start on my next task, which is Q2 planning. Once that’s done, I can disconnect with another short break. And having this cognitive white space is key to helping me be more effective when I’m focusing.
– Right, and this is really a great way to make sure that you pace yourself and balance that feeling then of always being on.
– Yeah, so another example is how we remind you to switch off with an experience we call virtual commute. Now nobody loves a commute, but this guides you to close out your tasks to free up valuable mental space to preview what’s planned for tomorrow, and then reflect on how you felt about the day. Starting at the end of June, the virtual commute experience will also be integrated with Headspace, so you can tap directly into guided meditation at the end of your day. And coming later this year, Viva Insights will offer you the ability to set quiet time, so you can silence mobile notifications from Teams and Outlook after hours, as well as show you personalized insights to reflect on how many days you had without that after hours work in meetings, emails, and chats. This helps you as a knowledge worker to mindfully disconnect, particularly important for our frontline worker population.
– Okay, but I have to ask, how does Viva actually know in terms of the logical endpoints of your day, Viva Insights knows about your schedule and your calendar. Where does it get that information from?
– So Viva Insights, as all Viva, is built on M365. And in this case built on the calendar constructs of Exchange Online. So as I’ll show you, we give you the ability to click into the settings and configure this as appropriate for you. In this case, I’ll keep it at 5:00 p.m. Similarly, you can also set up the virtual commute reminder for when you want to start wrapping up for the day. Mine’s at 4:30, which gives me 30 minutes to wrap things up, to be prepped for the next day.
– Right, and although these personal insights are available for everyone, why don’t we keep on the topic of configuration. For our admins that are watching, what does it take then to light up all these capabilities across your org?
– The Viva Insights app is available by default in Microsoft Teams to all users with Exchange Online mailboxes. You can also make it more discoverable to users in the Teams admin center. So under Teams app set up policies and the pinned app section, just search for Insights. And then many of our customers just pin Viva Insights, where they want it. This works for PCs, Macs, and in the browser, and you can also configure it for select users using PowerShell. For example, you can configure experiences like Headspace for specific users in your organization. And you can learn more about all of this at aka.ms/SetVivaInsights. With the quiet time settings coming later this year, you’ll also be able to create a policy via Microsoft Endpoint Manager. And this mutes mobile notifications from Teams and Outlook after hours for the specific users in your organization like frontline workers.
– Got it, let’s switch gears though, to the managers and the leaders of organizations. What do those experiences look like?
– So I mentioned the disconnect that we’ve seen managers and leaders having with their workforce. If you have workplace analytics today, manager insights helps you understand factors that for example may be contributing to things like burnout and stress on your team. Here, I can see things like whether people are consistently working after hours. And this gives me a gauge on employee burnout, which we know leads to attrition. In this case, we see 60% of the team consistently works after hours. And I can also see how that compares to other teams like mine, and get tips to help the team unplug at the end of the day. If we move up under coaching and development, we use de-identified data from Outlook and Teams to summarize how much time my team gets on average per week with their managers for one-on-ones, and take steps to make the right thing happen. Under Team effectiveness, I can see the percentage of long and large meetings, which are less effective. And then I can take action to change the meeting habits for my team.
– Right, and these insights are really great I think for managers, but why don’t we switch to the org leader and what they can see?
– Here, we provide leader insights for the C-suite and business leaders who need that broad visibility across the entire organization. Just as with manager insights, we provide visibility to after hours works for teams, the leaders can visualize this across their entire company. Then if we move down, you’ll see a free up capacity insight. And this helps a leader understand overall work patterns that may be pushing people into this after hours work. Here, I see that 43% of our people spend half or more of that time in collaboration. And this tells me there’s probably not enough time for them to focus during regular working hours. Moving to the Employee engagement tab, I see an interesting insight around employee empowerment. It looks at the time that employees spend with managers and one-on-one meetings, as well as meetings co-attending with their manager. A combination of this high manager and employee one-on-one and meeting co-attendance, may indicate a need to foster delegation, which we know makes teams more effective.
– So as a leader then, you might want different pivots on the data. So can you customize those insights for different views?
– You can. Every company is different. So the ability to do deep customization with the help of a data analyst is key. We have several out-of-the-box Power BI templates that can get you up and running quickly. These help you identify challenge areas that would benefit from change initiatives, and then you can measure the impact of those changes over time. As an example, the Ways of working report enables me to quickly visualize burnout risk. I can then drill into specific roles or functional areas to understand where I should focus my efforts as a leader, and then define an action plan to improve wellbeing. If you want to explore the data even further, you can work with your analyst to create a custom query from scratch. And this looks at the data from multiple perspectives. You can also leverage our open source repository of low-code, pre-built functions that create even deeper insights that are tailored to your specific business challenges.
– Okay, so you’ve touched now on the privacy aspect in terms of information a few times during the show, but how does this work then for Viva Insights?
– The first thing I’d say is that it’s all part of the Microsoft trust promise. And trust is inherent in the design. For personal insights as an individual using Viva Insights, just like an email address to you is private, so are all your personal insights. As I mentioned for manager and leader insights, all the data is aggregated and de-identified, so individual information is never surfaced or discernible for a manager or leader. We also add for these manager insights, another layer of protection with differential privacy. And this introduces statistical noise, which makes it impossible to identify an individual based on the collaboration patterns of the team.
– Right, I know this is such a critical topic and part of how we’ve designed Viva Insights. It’s also really great to see all the different updates that we’ve made to the Viva Insights experience. And for the people watching though, what’s your recommendation of where they can go to learn more and get started?
– Try it out for yourself. Get personal insights and wellbeing experiences, as I showed you with integrated into Teams. For manager and leader insights, contact your Microsoft account representative and get started. You can learn more about what I showed you today at aka.ms/VivaInsights. And we look forward to hearing your feedback.
– Thanks so much Kamal. And of course, don’t forget to watch the rest of our Microsoft Viva series at aka.ms/VivaMechanics, and also keep checking back for the latest updates across Microsoft. Be sure to subscribe if you haven’t yet, and thanks so much for watching.


Recent Comments