by Contributed | Mar 24, 2021 | Technology
This article is contributed. See the original author and article here.
I often get asked about why you should become Azure certified, or how to start with your Azure certification. Last week I was guest on the Azure Enablement show with April Edwards, to talk about Azure Certifications! In this video, April and I discuss why Microsoft Azure certifications are worth your time and energy; and how they can lead to more confidence and clarity in your job. Thomas and April share their own experiences and recommendations on how to prepare for exams and how to approach getting your own certifications.
If you have already decided to become Azure certified, my blog post on how to prepare for a Microsoft Azure Certification Exam can help you!
You can watch the full Azure Enablement Show: How and why to earn an Azure Certification video here on Microsoft Channel 9.
You can learn more here:
Also make sure you check out my blogs on Microsoft Certification:
I hope this Azure Enablement show video on Microsoft Azure certifications and the included information is valuable for your Microsoft Azure certification journey! If you have any questions feel free to leave a comment below!

by Contributed | Mar 23, 2021 | Technology
This article is contributed. See the original author and article here.
Context
You might know that this new SPFx v1.12 feature has an old story behind it. In the past, developers were getting web part’s width by unsupported ways like DOM classes or attributes. It was working pretty well until Microsoft decided to update SharePoint Online DOM in October last year and broke a lot of custom developments. As Microsoft says, DOM is not and API and you should avoid taking any dependencies in it but until now, nothing was officially released to solve this issue correctly. It’s now done, SPFx v1.12 adds a width property and an onAfterResize() event to determine the width of your web part.
Note: In this article, I’m using a web part project with SPFx v.1.12 and React framework.
Determine web part size
In your web part TS file, you can add the onAfterResize() method to get notified when the web part is resized (for example when you resize your window):
  protected onAfterResize(newWidth: number) {
    console.log("New web part width: " + newWidth);
  }
This new method is documented as below:
This API is invoked when the web part container dom element width is changed, e.g. when the browser window is resized and when the property pane is toggled open/closed.

@param newWidth — Width (in pixels) of the container for the web part after the resize event.

@remarks
Web parts should utilize this method to perform operations such as potentially re-rendering components based on the new available width for the web part.

@virtual
Then you can use the width property as a prop for your React component:
  public render(): void {
    const element: React.ReactElement<IDemoWebPartWidthProps> = React.createElement(
      DemoWebPartWidth,
      {
        description: this.properties.description,
        webPartWidth: this.width
      }
    );

    ReactDom.render(element, this.domElement);
  }
This new property is documented as below:
This propery returns the width of the container for the web part.

@returns — Width (in pixels) of the container for the web part.

@remarks
Web parts should utilize this property to perform operations such as any conditional styling of components based on the initial available width for the web part.

@internalRemarks
This function retrieves web part's key to get stored section width from cache. If cache key does not exist in cache it will calculate and store the width before returning.

In the case where getWebPartCacheKey is not passed down, it will go through the original workflow to caculate web part width.
And you can display it in your component render() method:
<p className={ styles.description }>Web part width = { this.props.webPartWidth }</p>
Final result of this demo web part:
This a great add to SPFx and allows developers to re-render components when the web part is resized :thumbs_up:
Happy coding everyone!
Resources
Determine the rendered web part width | Microsoft Docs
SharePoint Framework enterprise guidance | Microsoft Docs

by Contributed | Mar 23, 2021 | Technology
This article is contributed. See the original author and article here.
As we continue our powerful momentum in securing Linux platforms, we are excited to announce the public preview of Microsoft Defender for Endpoint on Linux antivirus behavior monitoring and blocking!
The new preventive antivirus functionality complements our existing strong content-based capabilities with behavior monitoring and deep memory scanning. These enhancements bring immediate ability to closely monitor processes, file system activities, and process interactions within the system. The enhanced ability to correlate events and behaviors across multiple processes allows us to more generically detect and block malware based on their behavioral classification. These behavior-based signals will act as additional runtime signals for behavioral cloud-powered machine learning models and for effective runtime protection.
Our Linux antivirus behavior monitoring and blocking can be previewed on any Linux distribution that is currently supported by Microsoft Defender for Endpoint on Linux:
- RHEL 7.2+,
- CentOS Linux 7.2+
- Ubuntu 16 LTS, or higher LTS
- SLES 12+
- Debian 9+
- Oracle Linux 7.2+
Microsoft Defender for Endpoint on Linux antivirus behavior monitoring seamlessly integrates into the existing preventive experiences. Behavior monitoring details and artifacts can be explored locally using the existing Microsoft Defender for Endpoint on Linux command line interface.
Behavior monitoring alerts appear in the Microsoft Defender Security Center (as well as in the Microsoft 365 security center) alongside all other alerts and can be effectively investigated.

What are the preview prerequisites for Linux antivirus behavior monitoring and blocking?
To experience the Linux antivirus behavior monitoring and blocking in public preview, you’ll need to have preview features turned on in the Microsoft Defender Security Center. If you have not yet opted into previews, we encourage you to turn on preview features in the Microsoft Defender Security Center or in the Microsoft 365 security center today.
As a preview entry prerequisite, please ensure the following requirements are fulfilled:
- Device must be in the InsiderFast channel
- Minimal Microsoft Defender for Endpoint version number must be (InsiderFast): 101.25.42
- Device must be explicitly enrolled into the preview. The preview enrollment can be activated / deactivated using the following commands:
$ sudo mdatp config behavior-monitoring –value enabled
$ sudo mdatp config behavior-monitoring –value disabled
- Microsoft Defender for Endpoint must be restarted for the enrollment/unenrollment commands to take effect.
How to start previewing Linux antivirus behavior monitoring and blocking?
To get started with the Linux antivirus behavior monitoring and blocking public preview:
- Ensure preview prerequisites are met
- Ensure to initially evaluate this new functionality on a selected subset of your non-production Linux devices
- Ensure cloud-delivered protection is enabled on devices enrolled into the preview by running the following command:
$ mdatp health –field cloud_enabled # this should print “true”
- Try “Do It Yourself” scenarios to see features in action. You can find “Do It Yourself” scenarios attached to this blog
- Continue running Linux clients enrolled into evaluation as you normally would
- Share your feedback and observations to help us improve.
We welcome your feedback and look forward to hearing from you! You can submit feedback through the Microsoft Defender Security Center or through the Microsoft 365 security center.
Monitor the What’s new in Microsoft Defender for Endpoint on Linux page for upcoming announcements (including general availability of Linux antivirus behavior monitoring and blocking). Stay tuned to our blog and Twitter channel to stay up to date on additional Microsoft Defender for Endpoint advancements.
Microsoft Defender for Endpoint is an industry leading, cloud ML powered endpoint security solution offering endpoint protection, endpoint detection and response, vulnerability management, and mobile threat defense. With our solution, threats are no match. If you are not yet taking advantage of Microsoft’s unrivaled threat optics and proven capabilities, sign up for a free Microsoft Defender for Endpoint trial today.
Microsoft Defender for Endpoint team

by Contributed | Mar 23, 2021 | Dynamics 365, Microsoft 365, Technology
This article is contributed. See the original author and article here.
Offering your customers and vendors rebates and royalty deals is key to building brand loyalty and has a measurable impact on your company’s margins. Rebates also influence your product pricing strategy and impact accruals, payments, deductions, and revenue. However, keeping track of rebate and royalty programs and calculating them accurately can quickly become time-consuming and tedious without the right tools. The rebate management module in Dynamics 365 Supply Chain Management, now available for public preview, reduces the administrative burden associated with these programs. The tool tracks and maintains rebates and deductions in a central location, where everyone can create, review, and process them effectively. Centralized rebate management The rebate management module gives you a central place to manage all your customer rebates, customer royalties, and vendor rebates, including the ability to: Define complex royalties, customer rebates, vendor rebates, and vendor rebates based on customer sales. Manage complex rebates where items or groups don’t share the same calculation basis, durations, or rebate amounts or rates. Manage multiple concurrent and overlapping rebate agreements for the same vendor or products and can net out one rebate against others. Track rebate accruals and handle dissimilar time periods for accrual and claim of rebates. Improve cash flow forecasting with an effective claims process. Provide flexibility with rebate calculation. Easily share reports for enhanced visibility. Cross-company rebate management The rebate management tool centrally manages the rebates and payouts across the company and easily calculates them on sales across multiple legal entities. Real-time reporting With the rebate transactions and statement report, you gain visibility into spend versus rebates, which helps you track how much you’ve spent on claimed rebates, versus what’s outstanding. You can also share reports with customers. Streamlined rebate process The streamlined rebate process includes accurate provisioning, claims, target transactions, and write-offs and it all starts with the rebate deals. It is common with high-tech wholesalers for vendor rebates to be based on sequential sales. The rebate management module supports this scenario by allowing the vendor rebate agreement to specify the conditions under which the vendor qualifies for a monetary reward if a buyer achieves the product sales targets. Flexible rebates can be based on the sales quantity, or value of the price basis, which can include the sales price, latest purchase price, average purchase price over a defined period, and FIFO purchase price by periodic calculation. Flexible calculations A complex rebate mechanism requires calculation flexibility. With the rebate management module, a calculation can be applied to a single customer, or to groups of customers, or to all your customers and products. Rebates with multiple detail lines can have different qualifying date ranges. The provision and claim periods may differ, for example, by processing provisions daily and claims once a month. The rebate management module enables you to configure rebates based on many diverse parameters such as a percentage, rate, or fixed amount. The module provides four core calculation methods (stepped, cumulative, rolling, and total). The configurable transaction types enhance rebate calculation flexibility. The multiple concurrent and overlapping rebates are able to set net against others by using a reduction principle in periodic processing. Next steps To learn more about the capabilities of the rebate management module, see Rebate management module overview.
The post Streamline and automate rebate management to increase margins appeared first on Microsoft Dynamics 365 Blog.
Brought to you by Dr. Ware, Microsoft Office 365 Silver Partner, Charleston SC.
by Contributed | Mar 23, 2021 | Technology
This article is contributed. See the original author and article here.
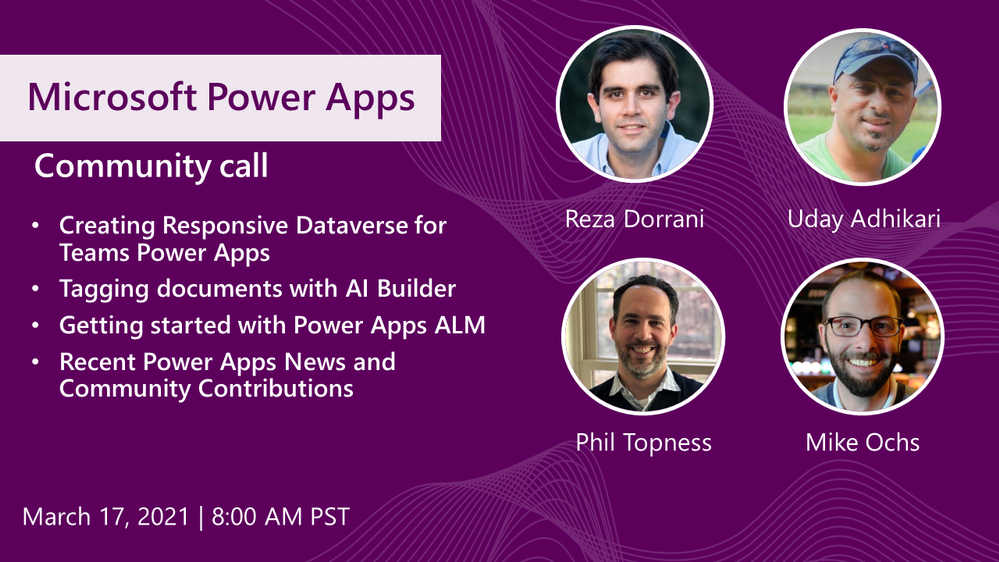
Call Summary:
Topics covered in this month’s community include Creating Responsive Dataverse for Teams Power Apps (Use responsive containers for gallery and underlying form screen connected to a Dataverse table), Tagging documents with AI Builder (Power Automate flow calls Computer Vision Read API to scan for keywords to tag documents), Getting started with Power Apps ALM (ALM Accelerators automate packaging of Power Apps projects for transfer) and Recent Power Apps News and Community Contributions. This session included Q&A in chat. The call was hosted by Todd Baginski (Canviz). Demo presenters include Reza Dorrani (Catapult), Uday Adhikari, Phil Topness and Mike Ochs. Recorded on March 17, 2021. Thank for attending the call or viewing it on demand.
Demos:
- Creating a responsive Power App running Dataverse in Teams – Minor configuration tips elevates OOB responsiveness to next level. Start with responsive containers template – layout for header, footer, and page body (gallery control). Create a form screen, same structure – header, footer, body (form control). Connect gallery and form to data source (table). Connect gallery and form together using item property. Data collected in form is stored in Dataverse, rendered in gallery item.
- Automating metadata tagging with AI using Power Automate – Need to scan and tag 15k inconsistently formatted documents annually that are uploaded to a Sharepoint document library? Presenter evaluated 3 capable options (OneDrive, OCR, Computer Vision) and based on technology strengths/limitations, choose Azure’s Cognitive Services – Computer Vision Read API that’s called from the shown Power Automate flow. Customer updates keyword mapping in a list rather than in the Flow.
- Getting started with Power Apps ALM – The Power CAT team has built 2 ALM Accelerators for Business Maker (Makers) and Advanced Maker audiences. Accelerators automate the process of packaging up a Power Apps Solution and all supporting components for complete and documented movement between environments – Dev, Text, Prod. Source control in GitHub or Azure DevOps. Makers Accelerator available now in CoE Starter Kit. ALM for Advanced Makers is in Private preview.
Recent News & Cool Stuff:
Actions:
Learn more:
Stay connected:

Recent Comments