
by Contributed | Feb 12, 2021 | Technology
This article is contributed. See the original author and article here.
_______________________________________________________ John Barbare and Tan Tran
Dear IT Pros,
We discuss about Microsoft Defender for Endpoint Antivirus Configuration, Policy and exclusion list in detail to avoid making the common mistakes and to apply the best practice to it.
Best Practices for AV Policy Settings:
- You may wonder what is the best Scan types for your daily scheduled scan on all systems, the Full Scan is for investigation of virus attack on the system, for the weekly or daily scheduled scan, it should be good and sufficient with quick scan.
- Make different Endpoint Configuration Manager AV policies for different device types and deploy the related policies to the corresponding collections, SQL Server Collection, IIS Server Collection, Restricted Workstation Collection, Standard Workstation Collection
Example of AV Policies for different Servers and Workstation types:

- Antivirus Exclusion recommendation from Microsoft Defender Team:

Common Mistakes:
DisableCpuThrottleOnIdleScans (Feature available on Windows 10 20H2)
This setting indicates whether the CPU will be throttled for scheduled scans while the device is idle.
- This parameter is enabled by default, thus ensuring that the CPU will not be throttled for scheduled scans performed when the device is idle, regardless of what ScanAvgCPULoadFactor is set to.
- DisableCpuThrottleOnIdleScans will override the value (5-100% CPU time) set by ScanAvgCPULoadFactor
An Example of CPU throttling controlled by MCM or by MEM:

- In my Lab, the on-demand fullscan also been impacted by non-throttling status too.
On the test device Windows 10 version 20H2 with the setting DisableCpuThrottleOnIdleScans turn on:
> Set-MpPreference -DisableCpuThrottleOnIdleScans $False

> Run on-demand full scan, Start-MpScan -ScanType FullScan

With the setting to allow CPU without Throttling , my computer did have CPU Spike from 11% before now it grows to more than 70%, 80%, 95% in a short period of 1-2 minutes.

We just need to disable in the related Registry Key of Windows Defender Scan or by powershell command in the device.

Registry Key for the setting,
ComputerHKEY_LOCAL_MACHINESOFTWAREMicrosoftWindows DefenderScan:

Antivirus Exclusion mistakes
Antivirus Exclusion could be helpful or harmful if we set Antivirus to skip the threat in files and process. The common misconception could be named a few.
- Exclude process which is the frontline interfaced to threat like MS Word, MS Outlook , Java Engine or Acrobat Reader.
- Exclude Cabinet, compress file .zip, .tar, .cab, .7ip from AV Scan, they could contain threat source.
- User Profile temp folder, System temp folder where the malicious file may locate as its base:
- C:Users<UserProfileName>AppDataLocalTemp
- C:Users<UserProfileName>AppDataLocalLowTemp
- C:Users<UserProfileName>AppDataRoamingTemp
- %Windir%Prefetch
- %Windir%System32Spool
- C:WindowsSystem32CatRoot2
- %Windir%Temp
- Use of environment variables as a wildcard in exclusion lists is limited to system variables, do not use user environment variables when adding Microsoft Defender Antivirus folder and process exclusions.
Grey Area of Exclusion:
Image files: You can chose to exclude file types, such as .gif, .jpg, .jpeg, .png if your environment has a modern, up-to-date software with a strict update policy to handle any vulnerabilities.
Missing MDE (Microsoft Defender for Endpoint) exclusion
- If you need to apply exclusion for threat detected by Defender for Endpoint Cloud Service, use the related exclusion.
- Microsoft Defender Antivirus exclusions don’t apply to other Microsoft Defender for Endpoint capabilities, including endpoint detection and response (EDR), attack surface reduction (ASR) rules, and controlled folder access.
- To exclude files broadly, add them to the Microsoft Defender for Endpoint custom indicators.

- To exclude files, folders in MDE

Example of Defender for Endpoint – MDE Exclusion from investigation scans:
> SettingsAutomation folder exclusions
> New Folder exclusion

> Add multiple folder exclusions as per our needs:

Default Exclusion on Newer Server Version (2016 and 2019)
Automatic exclusion available on 2016 and 2019 servers
On Server 2016, 2019, the automatic exclusion helps in prevention of unwanted CPU spike during real-time scanning, it is additional to your custom exclusion list and it is kind of smart scan with exclusion based on server role such as DNS, AD DS, Hyper-V host, File Server, Print Server, Web Server, etc.
- Your Custom exclusions take precedence over automatic exclusions.
- Automatic exclusions only apply to Real-time protection (RTP) scanning. Automatic exclusions are not honored during a Full/Quick or On-demand scan.
- Custom and duplicate exclusions do not conflict with automatic exclusions.
- Microsoft Defender Antivirus uses the Deployment Image Servicing and Management (DISM) tools to determine which roles are installed on your computer and apply the appropriate automatic exclusions.
The Discussion about Antivirus Configuration best practice could not be ended here, it might be our on-going attention and practice. I will continue updating this article with your feedback.
Until next time.
Reference:
Common mistakes to avoid when defining exclusions – Windows security | Microsoft Docs
Configure Microsoft Defender Antivirus exclusions on Windows Server 2016 or 2019 – Windows security | Microsoft Docs
Configure and validate exclusions based on extension, name, or location – Windows security | Microsoft Docs
Manage automation folder exclusions – Windows security | Microsoft Docs
by Contributed | Feb 12, 2021 | Technology
This article is contributed. See the original author and article here.
Fully automate DR instances of your SQL Pools and reduce the RPO in case of a failure.
This article will show how to use Azure Data Factory (or Azure Synapse Pipelines) to build a pipeline that can be used to fully automate DR SQL Pools after each automatic snapshot, which can then be paused to save on costs. The pipeline is ready to be used to replicate more than one SQL Pool because it is completely generic and parameterized.
What is needed
Azure Key Vault x1 – new or existing
Azure Data Factory v2 (or Azure Synapse Pipelines) x1 – new or existing
Azure Synapse Analytics workspace x2 – new or existing, to be used as source and target/DR
SQL Pool table x1 – metadata table to store the execution runs
SQL Pool stored procedure x 1 – to register each full run
1. Preparation
Azure key vault secret
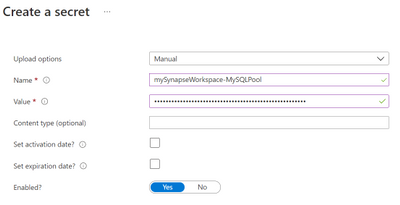
Create a new Azure key vault, or use an existing one, and create a new secret using:
Name |
<workspace_name>-<sql_pool_name> e.g. mySynapseWorkspace-MySQLPool |
Value |
<Connection_String> as found in the Azure Synapse SQL Pool connection string |
Screenshots of creating a new secret and getting the connection string from a SQL Pool:
Create a new secret
 Get SQL Pool Connection string
Note: replace User ID and Password as needed.
You need to grant the Azure Data Factory Managed Identity access to your Azure Key vault. Learn more here.
ADF linked service to Azure Key vault
In ADF, create a new linked service to the Azure Key vault instance where the SQL Pool connection strings are saved. This will be used to prevent having credentials stored in the ADF pipelines as well as to allow us to build a generic process.
 Create a new linked service to Azure Key vault
ADF linked service to Azure Synapse Analytics
In ADF, create a new linked service to Azure Synapse Analytics. This linked service will use the secrets in the Azure Key vault we referred before, making this a generic connector to Azure Synapse SQL Pools that we can use to connect to any SQL Pool as long as there’s a corresponding secret containing a valid connection string.
Here are the steps:
 New Azure Synapse Analytics linked service
 New linked service parameters
To configure the Secret name parameter, select Add dynamic content and in the new window click in the plus (+) sign to create a new parameter for the SQL Pool workspace name.
 Add dynamic content window
 New parameter for the workspace name
Click Save to return to the Add dynamic content window. Add another new parameter for the SQL Pool name: New parameter for the SQL Pool name
@concat(
linkedService().LS_SYNAPSE_WORKSPACE_NAME,
'-',
linkedService().LS_SYNAPSE_SQL_POOL_NAME
)
Now click on finish to accept the dynamic content and then on Test connection, to confirm that everything is ok. For that you need to provide values for the 2 parameters of this linked service:
 Parameter for the generic linked service
This is a dynamic connection to an Azure Synapse SQL Pool, meaning that we can use this linked service to connect to SQL Pools from different workspaces, as long as we have a defined connection string in the form of a secret in the above Azure Key vault.
Note: don’t forget to grant the ADF Managed Identity access to your Azure Synapse Analytics workspace. Learn more here.
Create metadata table and registration stored procedure
In each of the SQL Pools you want to automatically restore, create a new table. It will be used to store all the restores done by this ADF process and drive new ones.
CREATE TABLE [dbo].[restored_backups]
(
	[run_id] [int] NOT NULL,
	[name] [varchar](100) NOT NULL
)
WITH
(
	DISTRIBUTION = ROUND_ROBIN,
	HEAP
)
GO
In addition, create a new stored procedure. This process will use it to register full runs and drive new executions.
CREATE PROC [dbo].[p_register_restored_backup] @p_restore_id [INT], @p_name [varchar](100) AS
BEGIN
    INSERT INTO dbo.restored_backups(run_id, name) VALUES(@p_restore_id, @p_name)
END
GO
ADF Dataset for metadata
Before we create our first pipeline, we need to create a new Azure Synapse Analytics ADF dataset to read the metadata.
 New Azure Synapse Analytics dataset
Name the dataset “LastRestorePoint”, select the previously create linked service for the connection (SynapseFullParams) and click Ok to save it.
 Azure Synapse Analytics dataset properties
Note that the Dataset uses the previously configured generic Azure Synapse Analytics linked service, that needs 2 parameters (LS_SYNAPSE_WORKSPACE_NAME and LS_SYNAPSE_SQL_POOL_NAME). We now also need to create 2 similar parameters in the dataset (DS_SYNAPSE_WORKSPACE_NAME and DS_SYNAPSE_SQL_POOL_NAME):
 Dataset parameters
Additionally, and in the Connection tab, pass them to the linked service:
 Passing the dataset parameters to the linked service
LS_SYNAPSE_WORKSPACE_NAME |
@dataset().DS_SYNAPSE_WORKSPACE_NAME |
LS_SYNAPSE_SQL_POOL_NAME |
@dataset().DS_SYNAPSE_SQL_POOL_NAME |
2. Pipelines
Create first pipeline
The first pipeline will check if a SQL Pool restore is needed, by matching the latest automatic SQL Pool backup record (in sys.pdw_loader_backup_runs) and our metadata table.
Create a new pipeline, name it AutoDr and create the following parameters:
P_SOURCE_WORKSPACE_NAME |
P_SOURCE_SQL_POOL_NAME |
P_SOURCE_SUBSCRIPTION_ID |
P_SOURCE_RESOURCE_GROUP_NAME |
P_DR_SUBSCRIPTION_ID |
P_DR_RESOURCE_GROUP_NAME |
P_DR_LOCATION |
P_DR_WORKSPACE_NAME |
P_DR_SQL_POOL_NAME |
P_DR_DEPLOYMENT_NAME |
These will be used later and will help keep this process as generic as possible.
During testing, you can assign some default values to the parameters, to save some writing when you manually trigger the pipelines.
 Pipeline parameters
Now add a Lookup activity and configure as shown: Lookup parameters
Source dataset |
the name of the previously created dataset for the metadata, in our case “LastRestorePoint” |
DS_SYNAPSE_WORKSPACE_NAME |
@pipeline().parameters.P_SOURCE_WORKSPACE_NAME |
DS_SYNAPSE_SQL_POOL_NAME |
@pipeline().parameters.P_SOURCE_SQL_POOL_NAME |
Use query |
Query |
Query |
select top 1
       backups.run_id  as last_backup_run_id,
       backups.name    as last_backup_name,
	   restores.run_id as last_restore_run_id
from sys.pdw_loader_backup_runs as backups
left join dbo.restored_backups  as restores
      on (restores.run_id = backups.run_id)
where backups.operation_type = 'BACKUP' and
      backups.mode = 'FULL' and
      backups.status = 'COMPLETED' and
	  backups.progress = 100
order by backups.run_id desc
|
First row only |
checked |
All other settings |
as default |
Now publish your changes and test the pipeline (Add trigger / Trigger now). If you didn’t add default values to the pipeline parameters, know that for now only P_SOURCE_WORKSPACE_NAME and P_SOURCE_SQL_POOL_NAME are needed.
Note: The pipeline should run successfully no matter if there’s a restore needed or not. For now, it is only executing the above SQL query against a generically configured Azure Synapse Analytics SQL Pool. We will return to this pipeline later.
Create second pipeline
The goal for this pipeline is:
– delete the target DR SQL Pool, if any exists
– restore a running SQL Pool from the source workspace into the target DR workspace
– wait for the new SQL Pool to be created and restored
– pause the target DR SQL Pool, as an optional step to save costs if you don’t need to use this pool.
Create a new pipeline named “AutoRestoreSQLPool” and create the same parameters as for the first pipeline:
P_SOURCE_WORKSPACE_NAME |
P_SOURCE_SQL_POOL_NAME |
P_SOURCE_SUBSCRIPTION_ID |
P_SOURCE_RESOURCE_GROUP_NAME |
P_DR_SUBSCRIPTION_ID |
P_DR_RESOURCE_GROUP_NAME |
P_DR_LOCATION |
P_DR_WORKSPACE_NAME |
P_DR_SQL_POOL_NAME |
P_DR_DEPLOYMENT_NAME |
Add a Web activity, name it “Delete SQL Pool” and configure as follows:
 Web activity settings
URL |
@concat(
'https://management.azure.com/subscriptions/',
pipeline().parameters.P_DR_SUBSCRIPTION_ID,
'/resourcegroups/',
pipeline().parameters.P_DR_RESOURCE_GROUP_NAME,
'/providers/Microsoft.Synapse/workspaces/',
pipeline().parameters.P_DR_WORKSPACE_NAME,
'/sqlPools/',
pipeline().parameters.P_DR_SQL_POOL_NAME,
'?api-version=2019-06-01-preview')
|
Method |
DELETE |
Authentication |
MSI |
Resource |
https://management.azure.com |
This will call the SQL Pool REST API and send a DELETE request. For more information visit Sql Pools – Delete.
Note: the Azure Data Factory Managed Service Identity must have authorization to perform these types of requests, in this case to delete SQL Pools, on the involved Azure Synapse Analytics workspaces.
To grant the ADF MSI the Contributor role on a workspace using the Azure portal, open the “Access control (IAM)” of that workspace, click on “+ Add” / Add role assignment and populate as necessary. Here’s an example:
 Give Contributor role to an ADF MSI
Note: don’t forget to select the MSI entry and click Save.
The pipeline can now be published and executed.
This pipeline will not abort if there’s no SQL Pool with the given name and workspace (P_DR_SQL_POOL_NAME and P_DR_WORKSPACE_NAME). Because we will create a new SQL Pool using the same parameters, we don’t need to care for this fact but, if the goal was to only delete the target SQL Pool, then a verification activity should be added after the delete is called.
Now, add a second Web activity and connect the output of the above created Web activity (Delete SQL Pool) to this one and name it “Restore SQL Pool”. To learn more about the method used in this call visit this link.
Configure the settings as:
 Restore SQL Pool settings
URL |
@concat(
'https://management.azure.com/subscriptions/',
pipeline().parameters.P_DR_SUBSCRIPTION_ID,
'/resourcegroups/',
pipeline().parameters.P_DR_RESOURCE_GROUP_NAME,
'/providers/Microsoft.Resources/deployments/',
pipeline().parameters.P_DR_DEPLOYMENT_NAME,
'?api-version=2020-06-01')
|
Method |
PUT |
Authentication |
MSI |
Resource |
https://management.azure.com |
Body |
{
   "properties": {
      "mode": "Incremental",
      "template": {
         "$schema": "http://schema.management.azure.com/schemas/2014-04-01-preview/deploymentTemplate.json#",
         "contentVersion": "1.0.0.0",
         "resources": [
            {
               "type": "Microsoft.Synapse/workspaces/sqlPools",
               "apiVersion": "2019-06-01-preview",
               "location": "@{pipeline().parameters.P_DR_LOCATION}",
               "tags": {},
               "name": "@{pipeline().parameters.P_DR_WORKSPACE_NAME}/@{pipeline().parameters.P_DR_SQL_POOL_NAME}",
               "properties": {
                  "createMode": "Recovery",
                  "recoverableDatabaseId": "/subscriptions/@{pipeline().parameters.P_SOURCE_SUBSCRIPTION_ID}
/resourceGroups/@{pipeline().parameters.P_SOURCE_RESOURCE_GROUP_NAME}
/providers/Microsoft.Synapse/workspaces/@{pipeline().parameters.P_SOURCE_WORKSPACE_NAME}
/recoverabledatabases/@{pipeline().parameters.P_SOURCE_SQL_POOL_NAME}"
               },
               "resources": [
                  {
                     "condition": false,
                     "apiVersion": "2019-06-01-preview",
                     "dependsOn": [
                        "Microsoft.Synapse/workspaces/@{pipeline().parameters.P_DR_WORKSPACE_NAME}
/sqlPools/@{pipeline().parameters.P_DR_SQL_POOL_NAME}"
                     ],
                     "location": "@{pipeline().parameters.P_DR_LOCATION}",
                     "name": "config",
                     "properties": {
                        "Enabled": false
                     },
                     "type": "metadataSync"
                  }
               ]
            }
         ]
      }
   }
}
Note: due to presentation limitations, some lines were split (recoverableDatabaseId and dependsOn). Either merge them or use the file attached at the end of this page (“Restore SQL Pool – body request.zip”)
|
This activity will call the Azure Resource Manager REST API and request the incremental deployment of an Azure resource, in this case an Azure Synapse Analytics SQL Pool that will be recovered from another existing SQL Pool. More options can be found in the online documentation here.
Running this pipeline will trigger the deletion of the target DR SQL Pool and the creation of a new one by recovering from a source and existing SQL Pool.
At this point, the pipeline should look like this:
 Current design of the second pipeline
The next step is to pause the newly created target DR SQL Pool. We can’t do that immediately after calling the restore because it’s an asynchronous call that takes some time, depending on the size of the source SQL Pool. We need to wait and that’s exactly what the next activity will do.
Create 2 new variables that will be used to check if the target DR SQL Pool is created and restored. Notice the Boolean type for both:
 New pipeline variables
Now, add a new Until activity and connect the output of the “Restore SQL Pool” activity to the input of this one. Name it “Wait for Creation and Restore”.
The Expression inside the Settings tab should be:
@and(
variables('V_DR_CREATED'),
variables('V_DR_RESTORED')
)
|
This means that this activity will loop through until the newly restored target DR SQL Pool is created and fully restored.
Click on the pencil to design the activities for the loop.
 The Until activity
To better understand all the activities and how they are connected, let’s have a look at how it will look like at the end:
 The complete second pipeline
Start by adding a new Web activity, name it “Get SQL Pool Information” and configure as follows:
URL |
@concat(
'https://management.azure.com/subscriptions/',
pipeline().parameters.P_DR_SUBSCRIPTION_ID,
'/resourcegroups/',
pipeline().parameters.P_DR_RESOURCE_GROUP_NAME,
'/providers/Microsoft.Synapse/workspaces/',
pipeline().parameters.P_DR_WORKSPACE_NAME,
'/sqlPools/',
pipeline().parameters.P_DR_SQL_POOL_NAME,
'?api-version=2019-06-01-preview')
|
Method |
GET |
Authentication |
MSI |
Resource |
https://management.azure.com |
All other settings |
as default |
This activity sends a request for information on a SQL Pool to the Azure Synapse SQL Poll REST API. For more information visit this page.
If the request fails, we assume the target DR SQL Pool is not yet created (bottom part of the flow) and otherwise we will look at the status property, which will be Online when the SQL Pool is fully restored and ready to be used.
Add 2 new Set variable activities, connect them as the previous picture and rename them accordingly (“Set V_DR_CREATED to true” and “Set V_DR_CREATED to false”).
Note: to change a connection from green (Success) to red (Failure), select the connection you want to change, right click it and change its “Change To” value as desired.
 Changing connection conditions
The settings for these 2 activities should be:
 “Set V_DR_CREATED to true” settings
 “Set V_DR_CREATED to false” settings
To finish the bottom part of the flow (Failure), add a new Wait activity, name it “Wait For Creation – 30 secs”, connect it as depicted above and change its settings to 30:
 “Wait For Creation – 30 secs” settings
This activity will wait 30 seconds before allowing the Until activity to continue.
Next, add an If Condition activity, name it “Check If Restored”, connect it as shown before and change its Expression to:
@equals(
activity('Get SQL Pool Information').output.properties.status,
'Online'
)
This activity will read the value of the status property of the newly created target DR SQL Pool and check if it is “Online”. If not, we need to wait some time before checking again, otherwise the SQL Pool is ready to be used and we can continue with the pipeline.
To achieve this, we configure the If Condition activity as follows.
a) When true, we add a new Set Variable activity, name it “Set V_DR_RESTORED to true” and configure as:
 “Set V_DR_RESTORED to true” settings
In this case we signal that the SQL Pool is fully restored. This part of the pipeline will look like:
 Flow when the SQL Pool is fully restored
a) When false, we configure as follows.
Add a Set Variable activity, name it “Set V_DR_RESTORED to false” and set the Variables tab as:
 “Set V_DR_RESTORED to false” settings
Then, add a new Wait activity, name it “Wait For Restore – 30 secs”, connect it to the previous activity and configure its Wait time in seconds to 30.
This part of the pipeline will look like:
 When the SQL Pool is not yet restored
If there’s no need to pause the target DR SQL Poll, then this second pipeline is finished and we can jump to Complete the second pipeline.
If, instead, the SQL Pool needs to be paused, then we need to add that functionality as described in this next step.
At the top level of the pipeline (outside the IF’s and Until’s), add a new Web activity, name it “Pause SQL Pool”, connect it to the end of the Until activity and configure as follows:
 Activity to pause the SQL Pool
URL |
@concat(
'https://management.azure.com/subscriptions/',
pipeline().parameters.P_DR_SUBSCRIPTION_ID,
'/resourcegroups/',
pipeline().parameters.P_DR_RESOURCE_GROUP_NAME,
'/providers/Microsoft.Synapse/workspaces/',
pipeline().parameters.P_DR_WORKSPACE_NAME,
'/sqlPools/',
pipeline().parameters.P_DR_SQL_POOL_NAME,
'/pause?api-version=2019-06-01-preview')
|
Method |
POST |
Body |
<space> |
Authentication |
MSI |
Resource |
https://management.azure.com |
Note: when the Method is POST (or PUT), the Body cannot be empty. One way to avoid getting an error when publishing the pipeline is to add a space as the Body content.
This is the error when the Body is left empty:
 Error when method is PUT oor Post and body is empty
Spoiler (Highlight to read)
This Azure REST API call is also useful when we need to pause one or more SQL Pools, for example outside of working hours, to save on costs. One idea is to create one pipeline that pause a list of SQL Pools and another to resume them – then add time or event based triggers as needed.
You can read more about these API’s
here.
This Azure REST API call is also useful when we need to pause one or more SQL Pools, for example outside of working hours, to save on costs. One idea is to create one pipeline that pause a list of SQL Pools and another to resume them – then add time or event based triggers as needed.You can read more about these API’s here.
Complete the first pipeline
At this point, the second pipeline is finished. What is left is to invoke it from the first pipeline and write back the current restore id in the metadata table.
Back to the first pipeline, add a new If Condition activity, name it “Last Backup different from Last Restored”, connect it after the existing lookup and configure as follows:
Expression |
@not(equals(
string(activity('Check For New Backups').output.firstRow.last_backup_run_id),
string(activity('Check For New Backups').output.firstRow.last_restore_run_id)
))
|
This activity will compare the last backup run id (from the source SQL Pool system tables) with the last restore run id (from our metadata table also in the source SQL Pool). Not being the same (as the If Condition activity checks), means that a snapshot happened since the last time it checked and a restore needs to be done. If they are the same, it means that the last snapshot taken was already restored by this process.
In the “True” definition of the If Condition add a new Execute Pipeline activity, name it “Execute AutoRestoreSQLPool” and configure as follows:
Invoked pipeline |
AutoRestoreSQLPool, which is the name of second pipeline |
Wait on completion |
Checked |
Parameters: |
|
P_SOURCE_WORKSPACE_NAME |
@pipeline().parameters.P_SOURCE_WORKSPACE_NAME |
P_SOURCE_SQL_POOL_NAME |
@pipeline().parameters.P_SOURCE_SQL_POOL_NAME |
P_SOURCE_SUBSCRIPTION_ID |
@pipeline().parameters.P_SOURCE_SUBSCRIPTION_ID |
P_SOURCE_RESOURCE_GROUP_NAME |
@pipeline().parameters.P_SOURCE_RESOURCE_GROUP_NAME |
P_DR_SUBSCRIPTION_ID |
@pipeline().parameters.P_DR_SUBSCRIPTION_ID |
P_DR_RESOURCE_GROUP_NAME |
@pipeline().parameters.P_DR_RESOURCE_GROUP_NAME |
P_DR_LOCATION |
@pipeline().parameters.P_DR_LOCATION |
P_DR_WORKSPACE_NAME |
@pipeline().parameters.P_DR_WORKSPACE_NAME |
P_DR_SQL_POOL_NAME |
@pipeline().parameters.P_DR_SQL_POOL_NAME |
P_DR_DEPLOYMENT_NAME |
@pipeline().parameters.P_DR_DEPLOYMENT_NAME |
Then add a new Stored Procedure activity, name it “Register Restore ID”, connect it after the Execute Pipeline and configure as follows:
Linked service |
SynapseFullParams, which is the fully parameterized Linked Service we created at the beginning |
The Linked service properties will show up: |
|
LS_SYNAPSE_WORKSPACE_NAME |
@pipeline().parameters.P_SOURCE_WORKSPACE_NAME |
LS_SYNAPSE_SQL_POOL_NAME |
@pipeline().parameters.P_SOURCE_SQL_POOL_NAME |
Stored procedure name |
[dbo].[ p_register_restored_backup], click Refresh for the stored procedures to show up in the selection box |
Stored procedure parameters: |
click Import for the stored procedure parameters to show up |
p_name |
AutoDR Pipeline |
p_restore_id |
@string(activity('Check For New Backups').output.firstRow.last_backup_run_id)
|
This part of the pipeline and the settings for the stored procedure call will look like:
 Register current run in the metadata
And this completes the first pipeline and achieves the goal for this process.
As shown, it’s very easy to put in place a process to automatically restore Azure Synapse Analytics SQL Pools to serve different use-cases, on of them being the reduction of the RPO in case of a failure.
Although this is a fully functional process, some suggestions for improvement include:
Spoiler (Highlight to read)
– Extend the metadata table to include all runs of this process, even the ones that don’t restore SQL Pools
– Build time-based triggers to enable continuous execution of this process, maybe start by intervals of 1 hour and adjust as needed
– Once a SQL Pool is restored, and before it is paused, run some processes on the target DR SQL Pool. Examples are processes that may affect the performance during working hours and can be executed on a non-active SQL Pool, removing the need to scale up the active SQL Pools.
– Extend the metadata table to include all runs of this process, even the ones that don’t restore SQL Pools- Build time-based triggers to enable continuous execution of this process, maybe start by intervals of 1 hour and adjust as needed- Once a SQL Pool is restored, and before it is paused, run some processes on the target DR SQL Pool. Examples are processes that may affect the performance during working hours and can be executed on a non-active SQL Pool, removing the need to scale up the active SQL Pools.
In the future, look for another post where I will show how to fully export SQL Pools into partitioned areas in a Data Lake storage, that can be used to cover compliance regulations for long periods of backup retention and, on top, apply some backup storage lifecycle rules to take advantage of different types of storage with the goal of reducing storage costs.

by Contributed | Feb 12, 2021 | Technology
This article is contributed. See the original author and article here.
Qualification Limit for REORGANIZE to remove deleted rows from a rowgroup in Columnstore Index:
By default when one runs ALTER INDEX REORGANIZE the qualifying limit to remove delete rows from a rowgroup is –> the specific rowgroup have 10% of the max possible rows in a rowgroup deleted.
As the max possible rows in a row group is 1 million rows, the qualification limit is 10%, which is 100K rows deleted in a row group before the Reorganize removes them from the rowgroup.
From <https://docs.microsoft.com/en-us/sql/relational-databases/indexes/reorganize-and-rebuild-indexes?vie…>
This threshold limit has few concerns
- for few groups which are of full size of 1M rows, reaching 100K deleted rows may take a long time and until then the deleted rows are not cleared.
- For smaller rowgroups, the percentage of deleted rows will be huge but still the deleted rows will not be considered done.
New Trace flags from SQL 2019 CU9:
From SQL 2019 CU9 we have introduced 2 new trace flags for better management of the deleted rows.
Trace flag 11631 –> will not use the ~1M rows to calculate the 10%, but rather it will use the actual no of rows in a rowgroup.
Therefore if your rowgroup has only 20000 (20 k) rows, the limit comes to 10% of 20000 i.e to 2000 deleted rows, Thus, if have >= 2k rows deleted REORG will consider this rowgroup for cleanup of deleted rows
Trace flag 11634 –> will bring down the Percentage of deleted rows limit from 10% to 1%. If enabled together with trace flag 11631 then it will be 1% of the current number of rows in a rowgroup, instead of 1% of 1 million rows .
For example,
drop table TABLE1
–> create table
create table TABLE1
(
roll int,
Name char(10)
)
–>insert 5K rows
declare @i int
set @i=0;
while (@i<5000)
begin
insert into TABLE1 values (@i,‘test’);
set @i=@i+1;
end
–> Create a columnstore index
CREATE CLUSTERED COLUMNSTORE INDEX [TABLE1_CCIindex] ON dbo.TABLE1 WITH (DROP_EXISTING = OFF)
GO
–> Delte 3.5K rows (70% rows)
delete from TABLE1 where roll<3500
–> checking rowgroup properies
SELECT rg.total_rows,
cast(100.0*(total_rows – ISNULL(deleted_rows,0))/iif(total_rows = 0, 1, total_rows) as Decimal(6,3)) AS PercentFull,
100–cast(100.0*(total_rows – ISNULL(deleted_rows,0))/iif(total_rows = 0, 1, total_rows) as Decimal(6,3)) as PercentDeleted,
i.object_id, object_name(i.object_id) AS TableName,
i.name AS IndexName, i.index_id, i.type_desc,
rg.*
FROM sys.indexes AS i
INNEr JOIN sys.column_store_row_groups AS rg
ON i.object_id = rg.object_id
AND i.index_id = rg.index_id
WHERE object_name(i.object_id) = ‘TABLE1’
ORDER BY object_name(i.object_id), i.name, row_group_id;
–> Even though 70% of the rows are deleted, the REORGANIZE won’t consider this rowgroup for cleanup of the deleted rows.
ALTER INDEX [TABLE1_CCIindex] ON dbo.TABLE1 REORGANIZE à has no affect and the deleted rows wont be cleared
dbcc traceon(11631,-1) –> The threshold limit is now calculated for the 5K rows but not 1M rows. i.e So the limit comes down to 10% of 5K i.e >= 500 deleted rows.
dbcc traceon(11634,-1) –> Brings down the threshold limit further from 10% to 1% i.e from 500 to 50 deleted rows.
Now after the Trace flags are enabled, when we run the
ALTER INDEX [TABLE1_CCIindex] ON dbo.TABLE1 REORGANIZE –> effectively cleans up the deleted rows


Recent Comments