This article is contributed. See the original author and article here.
Initial Update: Tuesday, 16 February 2021 01:40 UTC
We are aware of issues within Application Insights and are actively investigating. Some customers in Switzerland West may experience intermittent data gaps of up to 10% of data and incorrect alert activation starting at 2021-02-15 00:15 UTC.
Next Update: Before 02/16 04:00 UTC
We are working hard to resolve this issue and apologize for any inconvenience. -Jeff
This article is contributed. See the original author and article here.
Before we dive into the differences between Azure Lab Services and Windows Virtual Desktop, let’s first get an overview of each one.
What is Azure Lab Services?
Azure Lab Services (AzLabs) enables institutions to quickly set up and manage classroom labs in Azure. Inside a lab, an educator can easily set up Windows or Linux VM learning environments, assign VMs to students, manage the student roster, and control students’ VM usage. Students see all of their lab resources in a single view and connect to lab VMs for their projects, assignments, and classroom exercises. AzLabs is a managed service that simplifies the experience of using Azure resources for teachinglearning. This means that AzLabs fully manages the cloud infrastructure running behind classroom labs on behalf of the institution. For more information, refer to the AzLabs documentation.
What is Windows Virtual Desktop?
Windows Virtual Desktop (WVD) is Azure’s platform desktop and app virtualization service. WVD is not necessarily education-specific and addresses a wide range of virtualization scenarios across industries. WVD enables organizations to provide users with a full desktop experience for Windows 10, Windows Server, or Windows 7. In addition, WVD enables remote application access, which can be used to provide users with direct access to individual Windows applications, such as Office 365’s Excel or Word applications. WVD is also a managed service since it manages the connections to VMs; however, organizations have greater responsibility when it comes to configuring and managing the involved AAD tenant and infrastructure. For more information, refer to the Virtual Desktop documentation.
Which Do I Use?
Here is a general guide on when to use Azure Lab Services and Windows Virtual Desktop.
Azure Lab Services
AzLabs is optimized to manage classroom labs’ underlying cloud infrastructure on behalf of institutions. With AzLab’s easy to use experience, institutions can quickly set up customized teaching/learning environments for time-boxed events, such as a course running for a semester or a hackathon running for a weekend. AzLabs is lightweight in the sense that labs are created only when you need them and cleaned up when you don’t.
AzLabs is best suited to:
Enable both IT and educators to quickly set up and manage VMs without technical expertise.
Provide VM learning environments that can be deleted and easily recreated as needed.
Control and minimize the costs by managing students’ usage hours on the VMs.
Estimate costs using a simplified pricing model.
Provide students with admin access to their own individually assigned VM environment.
Use multiple applications and tools in conjunction with each other.
Create both Windows and Linux VMs.
The following list includes example types of classes that institutions have run that showcase where AzLabs is ideal to use:
Computer programming class – A computer programming class typically requires a development environment, such as Visual Studio, and involves various debugging toolsemulators that must be used in conjunction with one another. This type of class may also require students to make configuration changes to the VM environment itself.
Data science class – Data science classes are similar to computer programming classes because student workloads involve a variety of deep learning frameworks and tools. Since the process to train machine learning models is often GPUCPU intensive, students may need their own VM for optimal performance.
Cybersecurity class – In a cybersecurity class, students need access to several VM environments so that they can practice scenarios where one VM demonstrates a vulnerability and another is used to exploit the vulnerability. For this class, each student is provided a Windows Server host VM that has several nested VMs.
For further information on how to use AzLabs to set up various class types, refer to the class types overview.
Windows Virtual Desktop
WVD is optimized to minimize costs by sharing and scaling a pool of VMs across users within an organization. WVD is not education-specific, nor is it focused on the teaching/learning experience. WVD offers highly configurable Windows virtualization experiences, but with this flexibility comes complexity. WVD requires your organization’s IT to be involved in its setup and management of the backing AAD tenant and infrastructure.
WVD is best suited to:
Give access to individual Windows line-of business or Office 365 apps.
Provide users with continuous, 24-hour access to apps or desktop environments.
Minimize costs by sharing and scaling pooled VMs across users.
Here are some educational use cases where WVD is ideal to use:
Virtual computers for libraries or offices – Institutions looking to replace general-use Windows computers, such as library computers, with a cloud-based offering can use a virtualized environment for this purpose. For example, library computers usually provide students with access to basic applications such as Office and a browser.
Accounting class that only needs Excel – WVD’s remote app virtualization is ideal for classes that only need to provide students with access to a single application.For example, an accounting class where the students need to learn and have access to Excel.
There are additional factors that should be considered when choosing between these two offerings. The following table summarizes key comparison points based on the current functionality for each offering.
Later in this guide we cover these points in detail and provide a roadmap of upcoming features that will impact these comparison points in the future.
Azure Lab Services
Windows Virtual Desktop
1.
Setup and management
Educators are provided a simplified experience (that requires no technical expertise) to easily set up and manage labs within the policies set by their IT department.
IT is solely responsible for setting up and managing the pool of VMs and related resources since technical expertise and access to the institution’s Azure subscription is required.
2.
WindowsLinux support
VMs are provisioned with the flexibility of choosing from a variety of base images, including Linux, various versions of Windows, and custom images.
VMs can be provisioned specifically with Windows 10, Windows Server 20162019, or Windows 7 based images (noLinux). Custom images are supportedfor the previously mentioned Windows versions.
3.
Student account
domain access
Students connect using an Office 365 account, Azure Active Directory email account or personal Microsoft accounts.
Users connect using an Office 365 account that is synchronized with an on-premise Active Directory.
4.
Persistent student workspace
Students’ work and data on the VM is persistent across sessions until a lab’s template VM is republished or the lab is deleted.
With FSLogix profile containers, users have persistent access to their user settings and their user profile folder which includes subfolders such as Desktop, Documents, Music, Pictures, etc. User profiles are maintained across VMs and when VMs are reimaged.
Like Lab Services, users may also be assigned their own dedicated VM so that their work and data is persistent across sessions for the lifetime of the VM.
5.
Device connection
Students may connect from any device that has a native remote desktop client installed; this includes Windows, Android, MacOS or iOS device.
Also, supports connecting from a modern browser.
Same as AzLabs.
In addition, supports IGEL (linux-based) thin clients, with more thin clients coming soon.
6.
Cost control
IT and educators can limit exactly how many hours that students can use a lab’s VMs by setting user schedules and quotas – this ensures the budget is never exceeded.
Provides cost savings by sharing VMs across users and scaling VMs to automatically startstop during specified hours – scaling drops costs by 30% on top of the savings from sharing VMs.
There is no ability to set user quotas.
7.
Pricing model
The pricing model is simplified to bundle the cost of storage, networking, and VMs into a single price point.
The pricing model is based on the cost of storage, the type of VM used, and networking; institutions are responsible for factoring in these costs.
Additional details
Here are comparison points in more detail.
1. Setup and Management
A key decision point to consider is how an institution plans to divide the responsibility of setup and management across their IT department and educators. AzLabs enables educators to self-sufficiently manage their own lab of VMs within the boundaries set by their IT department. WVD is managed entirely by an institution’s IT department.
Azure Lab Services
AzLabs only requires that a lab account and its policies be set up and managed by their IT department; the lab account serves as a management container for one or more classroom labs. Once the lab account is created, educators are granted permission to create and self-manage their classroom labs. Specifically, educators can independently perform the following tasks using AzLabs’s simplified user experience:
Create, update, and delete VMs.
Select the base image and install additional softwaretooling on VMs.
Save and share custom images for reuse.
Set a schedule for VMs so that they are automatically startedstopped.
Set a quota for students that limits the number of hours that a VM can be used for.
Invite students to register for a VM using their email addresses.
Windows Virtual Desktop
WVD supports many of the same tasks mentioned above, but the key difference is that an institution’s IT department must perform these tasks because administrative access to Azure computing, networking, and security resources is required. Also, setup and management of these resources requires technical expertise since this involves using the Azure Portal, PowerShell, and REST programming interfaces.
WindowsLinux Support
With both WVDand AzLabs, you can choose from custom images or images from the public gallery to provision VMs.
Azure Lab Services
AzLabs supports the ability to use a wide variety of Linux and Windows images based on the unique needs of a class.
Windows Virtual Desktop
As the name suggests, WVD is intended only be used with specific versions of Windows – specifically, Windows 10, Windows Server 20162019, and Windows 7. Here’s why:
A key benefit of using WVD is to efficiently share pooled VM resources across users; multisession capabilities are supported only for Windows 10 and Server. Windows 7 is reaching end-of-life support, so for customers that still need to use this version, they can opt to use WVD to create a Windows 7 environment while continuing to receive security updates. If you specifically need to use Windows 7, WVD is the preferred option.
Student AccountDomain Access
An educational institution may require students to use a specific type of account for accessing VM resources. As a result, it’s important to note the differences between the two offerings.
Azure Labs Services
With AzLabs, students have the flexibility of using the following types of accounts:
A student email account that is provided by a university’s Office 365 or Azure Active Directory (AAD).
A Microsoft email account, such as @outlook.com, @hotmail.com, @msn.com, or @live.com.
A non-Microsoft email account, such as one provided by Yahoo or Google; however, these types of accounts must be linked with a Microsoft account.
A GitHub account; again, this account must be linked with a Microsoft account.
Windows Virtual Desktop
For a student to access a virtualized app or desktop using WVD, they must connect with a domain account from an institution’s Azure Active Directory (AAD).
Note: AzLabs’s VMs are currently not joined to a domain; however, functionality to make it possible to
join to a domain is coming soon. WVD’s VMs are joined to the domain.
Persistent Student Workspace
Another aspect to consider is how students persist their work and data.
Azure Lab Services
For classes that require students to have dedicated access to a VM, AzLabs is designed so that each student is permanently assigned their own VM to use throughout the lifetime of the class’s lab. This means students can save their work and data directly on the VM; and their work and data are persistent across sessions. Their work and data remain persistent unless the educator chooses to republish the lab’s image from the template VM which reimages the labs’ VMs.
Windows Virtual Desktop
WVD can be configured to share pooled VMs across users. With this configuration, each time that a user connects to a virtualized app or desktop, they may be accessing a different VM. In this case, we recommend setting up an FSLogixprofile containers so that a student’s profile follows them no matter which VM that they connect to in the pool. This allows them to save their work and data within their user profile folder which includes subfolders such as Desktop, Documents, Music, Pictures, etc.
It is also possible with WVD to virtualize an entire Windows desktop and assign the underlying VM to a single user – this essentially gives a user access to their own permanently assigned Windows VM where any work and data that is saved remains persisted for the lifetime of the VM. This configuration is commonly used for Windows 7 since it requires a full desktop and does not support multiuser sessions.
Device Connection
AzLabs and WVD both support connecting to VM resources using Windows, Android, macOS, and iOS devices. This requires that you install the appropriate remote desktop client on the device that you are connecting from. If you want to avoid installing this on your device, both AzLabs and WVD support the ability to connect using a modern web client.
Azure Lab Services
Refer to the following articles on how to connect to an AzLabs VM:
For further information on how to connect to a WVD resource, refer to the below articles. In addition, WVD is currently working with partners to enable thin clients. The first Linux-based thin client supported by WVD is IGEL.
With AzLabs, you have explicit control over costs to ensure the expected budget is never exceeded. WVD offers cost-minimizing scaling options.
Azure Lab Services
AzLabs provides three key features that allows both IT and educators to easily and precisely control costs:
Lab schedule – You can define a one-time schedule or a recurring schedule so that VMs in the lab automatically start and shutdown at a specified time. Keep in mind that no costs are incurred when the VMs are shutdown. For more details, refer to the guide on how to create and manage schedules.
Hourly student quota – Setting an hourly student quota allows you to specify the number of hours you want to give each student (outside the scheduled lab time) to use their VM. Once the student has reached this quota, the VM is automatically shut down and the student no longer has access. You can also set additional quotas for individual students as needed. For more details, refer to guides on how to set quotas for users and set additional quota for a specific user.
Automatic shutdown of VMs – Each lab comes with a setting to auto-shutdown students’ VMs when students disconnect from the VM (e.g. RDP session ends). This feature is enabled for Windows VMs, and the Linux version is currently being worked on. To learn more, see how to enable automatic shutdown of VMs on disconnect.
Windows Virtual Desktop
WVD has the following features that provide substantial cost savings:
Load balancing – WVD provides a depth-first load-balancing method to use for cost control. This cost control method gives granular control over the number of VMs that are allocated when students connect to resources in the host pool. For more details, refer to host pool load-balancing methods.
Dynamic scaling – To reduce costs further, dynamic scaling is used to shut down and deallocate VMs during off-peak usage hours, then restart them during peak usage hours. For more details, refer to the guide on how to scale session hosts dynamically.
Pricing Model
Both AzLabs and WVD pricing models are based on paying for the storage and type of VMs that you use. However, AzLabs’s pricing model is further simplified by bundling these costs into a single price point, called a Lab Unit.
Azure Lab Services
For AzLabs, the pricing is calculated using similar cost factors as described below for WVD; refer to specific details in the Azure Lab Services pricing guide. The key difference is that the compute size, disk type, and networking costs are bundled together as a Lab Unit. A Lab Unit is the cost unit that determines the price for each VM instance within a lab.
This article is contributed. See the original author and article here.
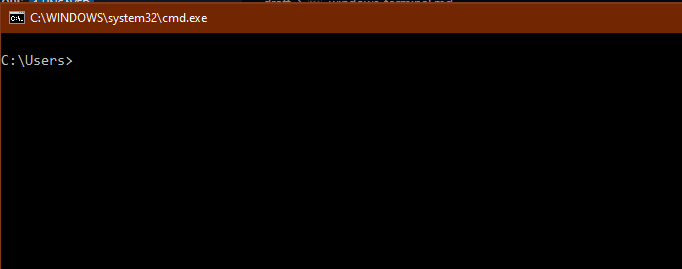
Do you remember the Command Prompt? Are you still using it?
Command Prompt
There were so many customization options in there like font size, font type, and colors (all eight of them)!
Command Prompt Options
If like me, you need a bit more customization, I do have something for you.
Windows Terminal is the re-imagination of what a first-class command prompt experience should and gosh does it deliver. Let me show you what I got when I first launched the Command Prompt from the terminal.
Windows Terminal First Look around
Introducing the Amazing Windows Terminal
So the first thing I noticed? Transparency. I know it may sound superficial, but it’s catchy. The second thing? The tab with two buttons beside it. + will allow me to have more Command Prompt in here without changing windows(yay!).
The down arrow had me wondering for a second, so I clicked it.
So many options…
Your options may vary, but I have Windows Linux Subsystem installed on my machine and a few other options, so Ubuntu shows up. I’m amazed that I can use any of those prompts from a single option. Mind blown!
Back to Command Prompt
We can open up any shell/prompt/command line from Windows Terminal, which is nice, but how does it make Command Prompt better?
See that image above with the Setting option in there? Let’s click on that, and it opens up this file in Visual Studio Code.
Making the old feel new again
Settings.json of Windows Terminal
That’s a ton of JSON, but it will become quite easy quite fast.
The first link at Line 3 will bring you to the Official Docs, which is perfect. It will show you how to go in detail on every point.
I want to make this even more straightforward for you.
Do you see Line 6? Visual Studio Code will read the schema definition and enable code completion within your JSON file straight away.
If I wanted to modify something, I would create a new line and press “, and suddenly, you have all the options available.
Let me give you a new cmd.exe profile that you can overwrite and have something feels brand new right now.
{

    // Make changes here to the cmd.exe profile

    “guid”: “{0caa0dad-35be-5f56-a8ff-afceeeaa6101}”,

    “name”: “cmd”,

    “commandline”: “cmd.exe”,

    “useAcrylic”: true,

    “acrylicOpacity”: 0.7,

    “backgroundImageOpacity”: 0.7,

    “backgroundImageStretchMode”: “fill”,

    “backgroundImage”: “https://wallpapercave.com/wp/wp2053618.jpg”,

    “startingDirectory”: “C:git_ws”,

    “fontFace”: “Cascadia Code”,

    “fontSize”: 12,

    “hidden”: false

}
End Result
Refreshed Command Prompt
That doesn’t even closely look like our classic Command Prompt.
There are be many more options to cover that we can cover in another article. What we did for Command Prompt, we could do for every terminal/shell in our previous list.
Next Steps
Want to have a terminal that stands out? Do you want a terminal that is suited just for you and no one else?
This article is contributed. See the original author and article here.
Jigar Dani, Principal PM Manager, Microsoft Sriram Srinivasan, Principal Software Engineering Manager, Microsoft
Over a decade ago Skype invented the Silk audio codec to transmit speech over the internet and catalyzed the voice over internet protocol (VoIP) industry. The primary codec used in VoIP then was G.722 that required 64 kbps to transmit wide band (16 kHz) speech, Silk on the other hand offered wideband quality starting at 14 kbps. Additionally, Silk was an adaptive variable bitrate codec that seamlessly switched from delivering narrow band (8 kHz) speech at ultra-low bandwidth of 6 kbps to offer a near transparent quality speech at higher bit rates. This was critical for dial-up and limited broadband internet that existed at that time and has served us well as the default codec for Skype and Microsoft Teams. It is also the basis of the voice mode of the OPUS codec which has been predominantly used in VoIP solutions in the last decade.
As we enter a new decade users have options to choose from several high-end connectivity alternatives such as high-speed broadband, optical fiber and 5G. Yet large segments of our user base are still limited to low cable internet speeds or 3/4G cellular networks. They encounter constrained network situations with over 50% packet loss and sporadic loss of coverage when moving between cell towers on commute or switching between network types. Network availability becomes unpredictable even when sharing internet at home with family members to stream video, gaming, work remotely and attend online schooling. Meanwhile, user expectations and essential need especially in the pandemic sometimes outpace the improvements in network connectivity. We have a need to communicate and collaborate on the go – on every device, every network, and every environment. Thus, efficient utilization of available bitrate is every bit as important today as it was in the dial-up world. Bitrate savings can be used to provide additional resiliency and/or improve experiences on other workloads like video and content sharing. We have considered these aspects to holistically address the challenges and deliver a virtual voice experience that is as good as talking in person even in ultra-low bandwidth and highly constrained network conditions.
Today we share details on our new AI powered audio codec – Satin, that can deliver super wide band speech starting at a bitrate of 6 kbps, and full-band stereo music starting at a bitrate of 17 kbps, with progressively higher quality at higher bitrates. Satin has been designed to provide great audio quality even under high packet loss. Here is the net effect of our improved resiliency algorithms and new Satin codec (use your favorite headset to hear the audio files):
Silk at 6 kbps, burst packet loss:
Satin at 6 kbps with improved resilience, burst packet loss:
We have built this codec with multiple decades of algorithmic experience combined with advanced machine learning techniques and in this blog we provide a deeper look at getting this codec ready for our users.
What’s narrowband, wideband, and super wideband voice? Our ear can generally perceive sounds that range in frequency from 20 Hz to 20 kHz. When dealing with discrete time signals, we need to sample the audio waveform at a minimum of twice the highest frequency we wish to reproduce. This is generally why CD-quality music is sampled at 44.1 kHz (44100 samples per second) or 48 kHz. Early telephony systems used a sampling rate of 8 kHz and could reproduce frequencies up to 4 kHz (in practice up to 3.4 kHz), which was considered sufficient at the time for speech communication. While a lower sampling rate implies fewer bits per second to transmit over the wire, it resulted in the all too familiar tinny voice quality over the phone as the higher vocal frequencies present in natural speech could not be reproduced. VoIP solutions, which were no longer limited by the narrowband telephony infrastructure, introduced us to the magic of wideband speech (reproduce up to 8 kHz, sampled at 16 kHz) and users were immediately able to appreciate the crisper, more natural and intelligible sound.
Codecs such as Silk and Opus (the default audio codec in WebRTC) took this a step further with the introduction of super wideband voice, capturing frequencies up to 12 kHz, sampled at 24 kHz (energy drops off rapidly at frequencies above 12 kHz for human voice). As mentioned earlier, higher sampling rates imply a higher bitrate. Satin re-defines super wideband to cover frequencies up to 16 kHz (sampled at 32 kHz) for greater clarity and sibilance, and its efficient compression enables super wideband voice at 6 kbps.
Frequency components of the sound /t/ in the word “suit.” There is a significant amount of energy well beyond the narrowband cut-off of 4kHz and even the wideband cutoff of 8 kHz. Preserving energy in the higher spectral components results in more natural sounding speech.
Listen to the two samples below in your favorite headphones. The Satin super wideband speech sample sounds a lot more natural and intelligible, much like what you will hear when you are talking to someone in person.
Silk narrowband at 6 kbps: Satin super wideband at 6 kbps:
How do you get super wideband at 6 kbps? To achieve super wideband quality at 6 kbps, Satin uses a deep understanding of speech production, modelling and psychoacoustics to extract and encode a sparse representation of the signal. To further reduce the required bitrate, Satin only encodes and transmits certain parameters in the lower frequency bands. At the decoder, Satin uses deep neural networks to estimate the high band parameters from the received low band parameters, and a minimal amount of side information sent over the wire. This approach solved the primary challenge of reproducing super wideband voice at ultra-low bitrates but introduced a new challenge of computational complexity. The analysis of the input speech signal to extract a low dimensional representation is computationally intensive. Real-time inference on deep neural networks adds to the complexity. The team then focused on reducing the complexity through both algorithmic optimizations as well as techniques such as loop vectorization beyond what the compiler could achieve. This resulted in close to a 40% reduction in computational complexity and allowed us to run on all our users’ devices.
As with all features, we A/B tested Satin before widely rolling it out – both to ensure there were no regressions, as well as to quantify the positive impact for our users. The A/B tests showed a high statistical significant increase in call duration for Satin compared to Silk at these low bitrates. Offline crowdsourced subjective tests to evaluate codec quality at 6 kbps showed the mean opinion score (MOS) rating of Satin to be 1.7 MOS higher than Silk.
How resilient is Satin to packet loss? Yes, majority of our calls are on Wi-Fi and mobile networks, where packet loss is common and can adversely affect call quality. Satin is uniquely positioned to compensate for packet loss. Unlike most other voice codecs, Satin encodes each packet independently, so the effect of losing one packet does not affect the quality of subsequent packets. The codec is also designed to facilitate high quality packet loss concealment in an internal parametric domain. These features help Satin gracefully handle random losses where one or two packets are lost at a time.
Another type of packet loss, which is even more detrimental to perceived quality, is where several packets are lost in a burst. Here, Satin’s ability to deliver great audio at a low rate of 6 kbps provides the flexibility to use some of the available bitrate for adding redundancy and forward error correction that helps us recover from burst packet loss. Satin allows us to do this without having to compromise overall audio quality.
Satin is already used for all Teams and Skype two-party calls. We are rolling it out for meetings soon. Satin currently operates in wideband voice mode within a bitrate range of 6 – 36 kbps and will soon be extended to support full-band stereo music at a maximum sampling rate of 48 kHz. We are very excited for you to try this new codec, let us know what you think.
This article is contributed. See the original author and article here.
Overview
Containerd is the default container runtime with AKS clusters on Kubernetes version 1.19 onwards. With a containerd-based node and node pools, instead of talking to the dockershim, the kubelet will talk directly to containerd via the CRI (container runtime interface) plugin, removing extra hops on the flow when compared to the Docker CRI implementation. As such, you’ll see better pod startup latency and less resource (CPU and memory) usage.
This change restricts containers from accessing the docker engine, /var/run/docker.sock, or use Docker-in-Docker (DinD).
In order to build docker images, Docker-in-Docker is a common technique used with Azure DevOps pipelines running in Self-Hosted agents. With Containerd, the pipelines building docker images no longer work and we need to consider other techniques. This article outlines the steps to modify the pipelines to perform image builds on Containerd enabled Kubernetes clusters.
Azure VM scale set agents is an option to scale self-hosted agents outside Kubernetes. To continue running the agents on Kubernetes, we will look at 2 options. One to perform image builds outside the cluster using ACR Tasks and another using kaniko executor image which is responsible for building an image from a Dockerfile and pushing it to a registry.
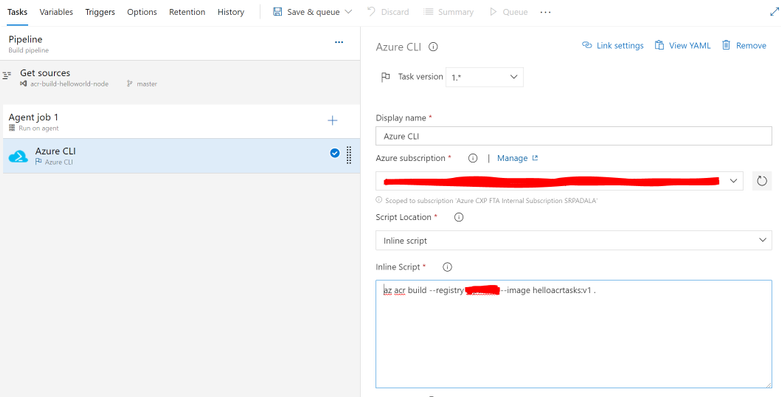
Modify the existing pipelines/create a new pipeline to add an Azure CLI Task running the below command.
az acr build --registry <<registryName>> --image <<imageName:tagName>> .
The command will:
Run in the current workspace
Package the code and upload to in a temp volume attached to ACR Tasks
Build the container image
Push the container image to the registry
The pipeline should look as illustrated below:
Though this approach is simple, it has a dependency on ACR. The next option deals with in-cluster builds which does not require ACR.
Building images using Kaniko
To use Kaniko to build images, it needs a build context and the executor instance to perform the build and push to the registry. Unlike Docker-in-Docker scenario, Kaniko builds are executed in a separate pod. We will use Azure Storage to exchange the context (source code to build) between the agent and the kaniko executor. Below are the steps in the pipeline.
Package the build context as a tar file
Upload the tar file to Azure Storage
Create a pod deployment to execute the build
Wait for the Pod completion to continue
The script to perform the build is as below:
# package the source code
tar -czvf /azp/agent/_work/$(Build.BuildId).tar.gz .

#Upload the tar file to Azure Storage
az storage blob upload --account-name codelesslab --account-key $SKEY --container-name kaniko --file /azp/agent/_work/$(Build.BuildId).tar.gz --name $(Build.BuildId).tar.gz

#Create a deployment yaml to create the Kaniko Pod
cat > deploy.yaml <<EOF
apiVersion: v1
kind: Pod
metadata:
  name: kaniko-$(Build.BuildId)
  namespace: kaniko
spec:
  containers:
  - name: kaniko
    image: gcr.io/kaniko-project/executor:latest
    args:
    - "--dockerfile=Dockerfile"
    - "--context=https://<<storageAccountName>>.blob.core.windows.net/<<blobContainerName>>/$(Build.BuildId).tar.gz"
    - "--destination=<<registryName>>/<<imageName>>:k$(Build.BuildId)"
    volumeMounts:
    - name: docker-config
      mountPath: /kaniko/.docker/
    env:
    - name: AZURE_STORAGE_ACCESS_KEY
      value: $SKEY
  restartPolicy: Never
  volumes:
  - name: docker-config
    configMap:
      name: docker-config
EOF
The storage access key can be added as an encrypted pipeline variable. Since the encrypted variables are not passed on to the tasks directly, we need to map them to an environment variable.
As the build is executed outside the pipeline, it is required to monitor the status of the pod to decide on the next steps within the pipeline. Below is a sample bash script to monitor the pod:
# Monitor for Success or failure

while [[ $(kubectl get pods kaniko-$(Build.BuildId) -n kaniko -o jsonpath='{..status.phase}') != "Succeeded" && $(kubectl get pods kaniko-$(Build.BuildId) -n kaniko -o jsonpath='{..status.phase}') != "Failed" ]]; do echo "waiting for pod" && sleep 1; done

# Exit the script with error if build failed

if [ $(kubectl get pods kaniko-$(Build.BuildId) -n kaniko -o jsonpath='{..status.phase}') == "Failed" ]; then
    exit 1;
fi
The complete pipeline should look similar to below:
Task 1: [Optional ] Get the KubeConfig (If not supplied through secrets)
Task 2: [Optional ] Install Kubectl latest (if not installed with the agent image)
Task 3: Package Context and Prepare YAML
Note how the pipeline variable is mapped to the Task Environment variable
Task 4: Create the Executor Pod
Note: Alternatively, can be included in the script kubectl apply -f deploy.yaml
Task 5: Monitor for Status
Summary
These build techniques are secure compared to Docker-in-Docker scenario as no special permission, privileges or mounts are required to perform a container image build.


Recent Comments