by Scott Muniz | Sep 14, 2020 | Uncategorized
This article is contributed. See the original author and article here.
In about a week from today Microsoft Ignite 2020 gets underway. It’s quite a bit different this year but the one thing you can be certain of is we have lots of new and interesting content for you to enjoy.
If you haven’t registered yet, go do it now! It’s free to attend this year, and packed full of digital experiences for you to enjoy.
This post is to highlight the Exchange, Outlook and Bookings sessions we have created and curated for your viewing pleasure. The links won’t be live until the event starts, but we wanted to give you a peek into what to expect.
To be honest we have seen this shift to digital as an opportunity to give you more sessions about the things you want to hear about. With less constraints like rooms and speakers and space to worry about we decided to create content this year you wouldn’t normally get to see, and we really hope you enjoy it!
Here’s a list of all the material we have available, with links that will go live when the event starts on September 22nd 2020 at 8am PST. Enjoy!
Roadmap Sessions – Focused on What’s New and Upcoming
- Exchange – Here, There and Everywhere – Exchange might have been around for more than 20 years but that doesn’t mean it’s old – Come and hear about our plans for the future of both on-prem and cloud, we’ll talk through some of the lifecycle changes taking place and give you an all around look inside the thing that is – Exchange.
- The Outlook vision: IT and user value in a hybrid workspace – Hear from Outlook’s new leader, Lynn Ayres, on how to empower your users and organization in areas such as Time Management, Mobile Productivity, and hybrid workplaces. Learn about the “One Outlook” vision – inspiring agile innovation, providing IT with tools to meet security and compliance standards, and offering users more value, faster. Lynn will cover the use of AI to help users get work done more efficiently, new integrations with Microsoft 365 apps, and Bookings in the Enterprise.
- Exchange Online IT Admin Experiences – We’ve been working very hard on updating the Exchange Online admin interfaces, and we’d like to show you the results! Come and see what we’re working on in the new Admin Center and hear about our plans for Exchange Online PowerShell.
- The Evolution of Outlook – Learn about the vision for the evolution of Outlook as your personal organizer and the transformation of communications and time management in the workplace. We’ll share the roadmap for Outlook and its future within the scaffolding of the evolving Microsoft 365 productivity suite.
- Exchange Online Transport – New Email Management, Optics, and End-user Experiences – The Exchange Online Transport team don’t just do plumbing, oh no. They see it as their mission to make sure emails arrive on time, get where they’re supposed to be going and do so with style. They have been busy the last year building some very cool features to turn sending and receiving email from mundane to joyful.
- Introducing the new Outlook for Mac – Last year, in November we launched a preview of the new Outlook for Mac for our Insiders users – with a brand new user experience and rebuilt on Microsoft sync technology. Since then we have been hard at work adding an incredible number of new features and experiences. Come learn about all the new capabilities that makes this the best mail and calendar application on the Mac platform.
- Microsoft Bookings – Our Vision – Learn about our vision for Bookings as your smart scheduling tool. We’ll discuss how Bookings can be used to meet a variety of your organization’s scheduling needs, and also give you a glimpse into our future roadmap and key scenarios.
Technical Deep Dives or Walk-throughs
- Outlook Calendar: Fundamentals and Collaboration – We know that features must work flawlessly, and that you want to be able to use any Outlook client to accomplish your time management needs. This sessions updates you on these “fundamental” investments so that your users have less issues, more consistency, and love using the features that Outlook offers them.
- Exchange Online Transport – Email Security Updates – The Exchange Online Transport team don’t just do plumbing, or delivering email with style, oh no. They do it all while ensuring the security of the data they send and receive is second to none. Come and hear about the latest updates to Exchange Online transport designed to ensure security and integrity of your mission critical communications.
- Outlook and its place in your organization’s mobile productivity strategy – Delegate and shared mailboxes. Check. Sensitivity labeling. Check. Up Next, dark mode and more. Check. What’s next? Split screens, drag and drop and connected experiences: learn about the innovation in Outlook mobile designed to keep you organized, connected and prepared through out your day asked for by our leading Enterprise customers.
- Deploying and Administering Microsoft Bookings – Take a deeper look under the hood of Microsoft Bookings. Learn more about what happens behind the scenes when a Bookings calendar is created, how Bookings interfaces with Exchange and Outlook, and best practices in managing its usage across your organization.
- The new Outlook for Mac – Under the Hood – Come learn about the internals of the new Outlook for Mac and some best practices on how to deploy it within your organization. We will go over all nuts and bolts such as how the Microsoft sync technology works, various account types we support, authentication models, deployment configurations that you can deploy that best suit your needs and much more.
- Delivering a better, more innovative Outlook faster than ever – Understand how the common architecture and embedded web experiences will change the face of Outlook, and it’s already started
- Voice and more AI assistance in Outlook – From neural network voice readouts to voice commanding — Explore and see demos of AI and Cortana capabilities built into Outlook that help take the load off your workforce for optimal personal organization and time management.
- What’s new in Outlook on the Web – Outlook on the web is one of the first apps where we ship new and awesome stuff, and this year will be no different! Come join us on a session so we can show you all that is new, we have AI, Search, and more!
- What’s new in Outlook on mobile browser – Remember the update we did to Outlook on a desktop browser? We are doing the same to Outlook in a mobile browser! Come join us as we share all our updates and new features.
- Sorting out your Outlook contacts and connections – Outlook is enhancing the way you manage contacts on your mobile device with new sorting and filtering options, support for contact subfolders and a performance updates you’ll love. No more duplicates! Tune in to learn about these new updates and get a preview for what is next to come.
Learning Path – Mailbox Protection with Microsoft 365
This particular set of content is important and we’ll have more on this subject in the coming months, but the high level is this: How can you be sure we look after and protect your email and calendar data from end to end? What are all the things we do to make sure that your data is protected and privacy ensured from the device in your hand or on your desk to the bits on a disk in one of our datacenters.
This collection of recordings help explain what we do, how it works, and what it means, and we really hope you find these recordings helpful and informative. You’ll recognize the speakers as experts in their field.
Learning Path – Setting Up for Success With Exchange Online
This next set of material is something we probably wouldn’t have been able to do at Ignite this year were it a physical in-person event. Why? Because those kind of events we all fondly remember (remember the food? How can we ever forget the catering…) were always limited in terms of rooms, speakers and sessions. With an all-digital event, we can do whatever we want! Well, sort of. But in this case, we did exactly what we wanted to do – give you high quality content from the people that know it inside out.
The people presenting these sessions all work in Microsoft’s support or field organizations. Unlike our engineering and marketing teams they work with real customers day after day, helping solve issues and problems, helping customers get our software deployed and so on.
Engineering teams know how they designed something to work. Marketing knows what engineering told them about how it should work. The presenters of these sessions know how it actually works.
So, for some real world, hard-earned advice about migration from on-prem to the cloud, take a look at these recordings. You can consume them in any order, pick and choose what you want to see, or sit back and watch them as a collective playlist.
- Establishing Exchange Hybrid Mailflow – How to plan for and enable Hybrid. How to get SMTP mail to flow despite your overly complicated existing config.
- Plan and Run the Exchange Hybrid Configuration Wizard – This session covers the basics of why and how you need to run the HCW
- Configuring Exchange Hybrid Modern Auth – Securing your on prem Exchange Environment with modern authentication when enabling HMA. Learn how Conditional Access can be leveraged and how to lock down legacy auth and what to expect when using Outlook Mobile with HMA.
- Migrating mailboxes to Exchange Online – Lessons learned from the trenches of Support of how to perform Hybrid Mailbox migrations to Exchange Online with the best chance of success and the least amount of pain involved. We will also discuss the basics of how moves really work and go over common errors that are seen (and how to avoid them!).
- Gliding your Exchange Public Folders to the cloud – The session highlights best practices to be followed to ensure your public folder migration to Exchange Online is quick and trouble free.
- Solving Exchange Client Connectivity Conundrums – Client connectivity cases can often be very complex. From ActiveSync to Web Services there’s often confusion on where to start troubleshooting, what tools to use, and how to connect the dots. This session will use common issues to illustrate how a Microsoft engineer “follows the data” to drive case resolution.
- Connecting Exchange Hybrid and Teams – How to enable Teams for your Org even though your mailboxes are still on-prem.
- Managing Exchange DL’s in a Hybrid Org – Common issue – how do you manage DL’s when users are split between on-prem and EXO – here’s how.
- Decommissioning On-Premises Exchange Servers – So you’ve moved all or most of your mailboxes to Exchange Online. You’ve been tasked with reducing or eliminating the on-prem footprint. How can we do this without causing availability issues or a support ticket? We’ll cover some gotchas we’ve helped our customer with so you’ll avoid the same pitfalls. We’ll review the process for the main portions of exchange, such as; client access, transport, and mailbox components.
- Troubleshooting Exchange Hybrid – Tips and Tricks for bumps you might hit along the way.
Wrap Up
We hope you agree, that’s a lot of content. We know, as we spent a lot of time making it the last month or two and we really hope you enjoy and learn from it.
We always love to hear your feedback, but unlike physical events you can’t just come down to the booth after a session and talk to the speaker or the team. The best place to leave feedback or ask question will be in the Tech Community, so please interact there with us, or leave comments here on the blog.
Speaking of Tech Community, we’ve arranged a post-event Ask Me Anything session so you can ask us questions! The AMA will take place on October 8th from 9:00 – 10:00am PST in the Exchange AMA space in the Exchange Community. We’ll remind you all nearer the time, but if you want to pop that into the old calendar now, that would be splendid.
Greg Taylor
Director of Product Marketing – Exchange Server and Online
by Scott Muniz | Sep 14, 2020 | Uncategorized
This article is contributed. See the original author and article here.
Another day I got this case about Synapse feature limitation. The customer was not sure about the information found on the documentation.
So the idea here is a quick review about the documentation.
Spark Limitations:
When you create a Spark Pool you will be able to define how much resources your pool will have as you can check it here: https://docs.microsoft.com/en-us/azure/synapse-analytics/quickstart-create-apache-spark-pool-portal
If you may want to define a CAP for the session that you are executing and that is the example: https://techcommunity.microsoft.com/t5/azure-synapse-analytics/livy-is-dead-and-some-logs-to-help/ba-p/1573227
In other words, you may have one notebook taking over all your resources or you may have 5 notebooks running at the same time, looking though this way there is not a fixed limit as you would see on ADW. Spark is a pool of resources.
This one I guess it is better to get an idea: https://docs.microsoft.com/en-us/azure/synapse-analytics/spark/apache-spark-concepts
“It is the definition of a Spark pool that, when instantiated, is used to create a Spark instance that processes data. When a Spark pool is created, it exists only as metadata; no resources are consumed, running, or charged for. A Spark pool has a series of properties that control the characteristics of a Spark instance; these characteristics include but are not limited to name, size, scaling behavior, time to live.”
Thanks to my colleague Charl Roux for the discussion about Spark.
ADF Pipeline:
This one is clear on the documentation:
:https://docs.microsoft.com/en-us/azure/data-factory/concepts-pipelines-activities
|
concurrency
|
The maximum number of concurrent runs the pipeline can have. By default, there is no maximum. If the concurrency limit is reached, additional pipeline runs are queued until earlier ones complete
|
About SQL OD:
(https://docs.microsoft.com/en-us/azure/synapse-analytics/sql/on-demand-workspace-overview)
“SQL on-demand is serverless, hence there is no infrastructure to setup or clusters to maintain. A default endpoint for this service is provided within every Azure Synapse workspace, so you can start querying data as soon as the workspace is created. There is no charge for resources reserved, you are only being charged for the data scanned by queries you run, hence this model is a true pay-per-use model.”
So basically here we have another scenario of not a documented limit because there is no fixed limit. You could 300 small queries running or you could have the one query running alone and using all resources while the others wait. SQL on-demand has a Control node that utilizes a Distributed Query Processing (DQP) engine to optimize and orchestrate distributed execution of user query by splitting it into smaller queries that will be executed on Compute nodes. In SQL on-demand, each Compute node is assigned a task and set of files to execute the task on. The task is a distributed query execution unit, which is actually part of the query user submitted. Automatic scaling is in effect to make sure enough Compute nodes are utilized to execute user queries.
As for ADW the limits are pretty much clear on the documentation and it is tied to the Service Levels:
https://docs.microsoft.com/en-us/azure/synapse-analytics/sql-data-warehouse/memory-concurrency-limits
That is it!
Liliam C Leme
UK Engineer
by Scott Muniz | Sep 14, 2020 | Azure, Technology, Uncategorized
This article is contributed. See the original author and article here.
Introduction
This is Andrew Coughlin and I am a Customer Engineer at Microsoft focusing on Azure IaaS. In this blog I will focus on how to upload a custom windows Hyper-V image for generation 2 virtual machines in Azure. Support for generation 2 virtual machines in Azure was released on November 4, 2019, these systems use UEFI boot, SCSI, supported on VMs that support premium storage compared to generation 1 which use PCAT boot, IDE and are available on all VM sizes. Generation 2 VMs provide for OS disk size greater than 2TB in size and build larger VMs, up to 12TBs. To get additional information about generation 2 virtual machines in Azure please visit this post.
If you have ever uploaded a custom image in Azure in the past you will notice the process is very similar.
Prerequisites
- Review the Support for generation 2 VMs on Azure.
- Install Azure PowerShell as documented here.
- Create Hyper-V Gen 2 machine to be used as the image.
- Prepare your Windows Hyper-V image is documented here.
- Convert VHDX to VHD as documented here.
- Download and Install azcopy as documented here.
- Sign in with Azure as documented here.
- Select Azure subscription to upload image as documented here.
Upload Hyper-V Image to Managed Disk
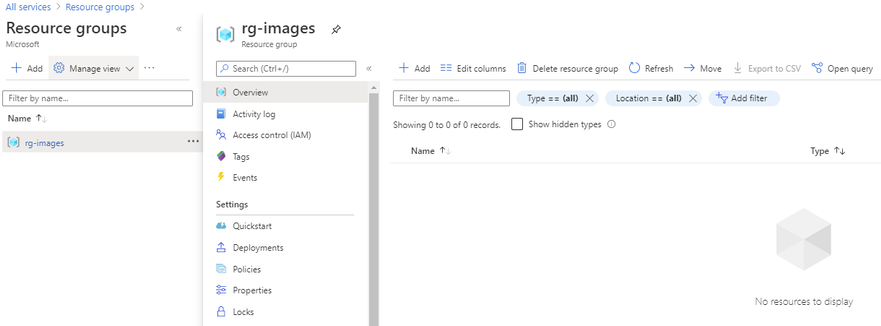
First you want to determine which resource group the image will reside in or if you will create a new resource group. As a reminder a resource group is a container that holds related solutions: virtual machines, storage accounts, disks virtual networks, etc. for your Azure solutions. A resource group can include all resources for your solutions or only those resources that you want to be managed together. For documentation on how to create a new resource group, this can be found on this page. In this example I’m going to use the resource group called “rg-images”.

First, we need to open an elevated PowerShell command prompt.

Next, we will set some variables as we will need these throughout the process, in this example. We are going to be creating this image in Central US, with the image name W2K19-Image-V2, in the resource group called rg-images, with a disk image called W2K19-Image-V2.
- $location = ‘Central US’
- $imageName = ‘W2K19-Image-V2’
- $rgName = ‘rg-images’
- $diskname = ‘W2K19-Image-V2’

Next, we want to create an empty managed disk, you will type the following commands:
$vhdSizeBytes = (Get-Item "<full File Path>").length

$diskconfig = New-AzDiskConfig -SkuName 'Standard_LRS' -OsType 'Windows' -UploadSizeInBytes $vhdSizeBytes -Location $location -CreateOption 'Upload'

New-AzDisk -ResourceGroupName $rgName  -DiskName $diskname -Disk $diskconfig

NOTE: You can replace the Standard_LRS, with Premium_LRS or StandardSSD_LRS. At the writing of this blog Ultra disks are currently not supported.
Next, we need to confirm the disk status is equal to “ReadyToUpload”, you will type the following:
$disk = Get-AzDisk -ResourceGroupName $rgName -DiskName $diskname

$disk.DiskState

NOTE: The disk status must be set to “ReadyToUpload”, if it is not you need to check what was typed in the “New-AzDiskConfig” command.
Now we want to create the writable shared access signature (SAS) for the managed disk we just created. Then we will get the disk status and make sure it is equal to “ActiveUpload”, to do this you will type the following:
$diskSas = Grant-AzDiskAccess -ResourceGroupName $rgName -DiskName $diskname -DurationInSecond 86400 -Access 'Write'

$disk = Get-AzDisk -ResourceGroupName $rgName -DiskName $diskname

$disk.DiskState

Now we are ready to upload our disk to Azure, to do this you will type the following and wait for the process to complete:
cd <location of Azcopy>

.azcopy.exe copy "<location of vhd>" $diskSas.AccessSAS --blob-type PageBlob

When the upload is completed you will get the following results:

After the upload has completed, you will revoke access from the disk as this is not needed, you will type the following:
Revoke-AzDiskAccess -ResourceGroupName $rgName -DiskName $diskname

Create Image from Managed Disk
We now have the managed disk uploaded to the cloud. The next step is to create an image from that managed disk. When the image is created, we want to make sure to specify this image will be a V2 image. To do this you will type the following:
$imageConfig = New-AzImageConfig -Location $location -HypervGeneration V2

$imageConfig = Set-AzImageOsDisk -Image $imageConfig -OsState Generalized -OsType Windows -ManagedDiskId $disk.Id

$image = New-AzImage -ImageName $imageName -ResourceGroupName $rgName -Image $imageConfig

Verify in the portal that our image is now created from our managed disk. We can now start provisioning generation 2 virtual machines with this image.

Conclusion
There you have it, we have just uploaded a custom windows image and now we can use that image to deploy generation 2 virtual machines in your Azure environment. Thank you for taking the time to read this blog, I hope this helps you and see you next time.
Disclaimer
The sample scripts are not supported under any Microsoft standard support program or service. The sample scripts are provided AS IS without warranty of any kind. Microsoft further disclaims all implied warranties including, without limitation, any implied warranties of merchantability or of fitness for a particular purpose. The entire risk arising out of the use or performance of the sample scripts and documentation remains with you. In no event shall Microsoft, its authors, or anyone else involved in the creation, production, or delivery of the scripts be liable for any damages whatsoever (including, without limitation, damages for loss of business profits, business interruption, loss of business information, or other pecuniary loss) arising out of the use of or inability to use the sample scripts or documentation, even if Microsoft has been advised of the possibility of such damages.
by Scott Muniz | Sep 14, 2020 | Uncategorized
This article is contributed. See the original author and article here.
 Kudos to @nitya for creating the Serverless September 2020 artwork (used as the cover image here). Feel free to use the image for any content (article, tweet, post or similar) you create.
Serverless September is our once in a year opportunity to keep talking about Serverless to our friends without feeling bad about it. To make things more exciting, we get the entire month of September, for 30 days, to tell the community how we are using Serverless.
Throughout September, we’re adding new content about building serverless APIs, using durable functions for event sourcing, automating day-to-day tasks and more to #ServerlessSeptember Content Collection on dev.to. On Fridays @madebygps and @codebeast live stream hacking the best and the most interesting bits of Serverless.
Keep an eye on our #ServerlessSeptember Content Collection that is updated every day with new content on dev.to.
by Scott Muniz | Sep 13, 2020 | Uncategorized
This article is contributed. See the original author and article here.
Microsoft has recently revealed an ARM Template DSL (Domain Specific Language), called Bicep to help devs build ARM templates quicker and easier.
There are several ways of provisioning resources onto Azure – via Azure Portal, or PowerShell or Azure CLI, or Azure SDKs in different languages, which all leverages Azure Resource Manager REST APIs. ARM template is one popular approach for DevOps engineers. However, many DevOps engineers have been providing feedback that ARM template is hard to learn and deploy at scales, as it can be tricky. Therefore, field experts like Microsoft MVPs have suggested many best practices about authoring ARM templates and share them through Azure Quickstart Templates or their own social platform. But it’s still the big hurdle to get through.
As of this writing, it’s v0.1, which is a very early preview. It means there will be many improvements until it becomes v1.0 including some potential breaking changes. Throughout this post, I’m going to discuss its expressions and how it can ease the ARM template authoring fatigues.
The sample .bicep file used for this post can be fount at this GitHub repository.
DO NOT USE BICEP ON YOUR PRODUCTION UNTIL IT GOES TO V0.3
ARM Template Skeleton Structure
ARM template is a JSON file that follows a specific format. A basic template looks like:
  {
    "$schema": "https://schema.management.azure.com/schemas/2019-04-01/deploymentTemplate.json#",
    "contentVersion": "1.0.0.0",
    "parameters": {},
    "functions": {},
    "variables": {},
    "resources": [],
    "outputs": {}
  }
Those parameters, variables, resources and outputs attributes are as nearly as mandatory, so Bicep supports those attributes first. Due to this JSON syntax, there have been several issues for authoring.
- First, it’s easy to incorrectly write the JSON template once the resource goes complex.
- Second, due to this complex structure, the readability gets dramatically reduced.
- Third but not the last,
parameters, variables, resources and outputs MUST be defined within their declared sections, respectively, which is not as flexible as other programming languages.
But Bicep has successfully sorted out those issues. Let’s have a look how Bicep copes with it.
Bicep Parameters
Parameters in Bicep can be declared like below. Every attribute is optional, by the way.
  param myParameter string {
    metadata: {
      description: 'Name of Virtual Machine'
    },
    secure: true
    allowed: [
      'abc'
      'def'
    ]
    default: abc
  }
The simplest form of the parameters can be like below. Instead of putting the metadata for the parameter description within the parameter declaration, we can simply use the comments (line #1). Also, instead of setting the default value inside the parameter declaration, assign a default value as if we do it in any programming language (line #7). Of course, we don’t have to set a default value to the parameter (line #8).
  // Resource name
  param name string

  // Resource suffix
  param suffix string

  param location string = resourceGroup().location
  param locationCode string
On the other hands, to use secure or allowed attribute, the parameter should be declared as an object form (line #3-5).
  param virtualMachineAdminUsername string

  param virtualMachineAdminPassword string {
    secure: true
  }

  param virtualMachineSize string {
    allowed: [
      'Standard_D2s_v3'
      'Standard_D4s_v3'
      'Standard_D8s_v3'
    ]
    default: 'Standard_D8s_v3'
  }
Note that the parameter declaration is all about what type of value we will accept from outside, not what the actual value will be. Therefore, it doesn’t use the equal sign (=) for the parameter declaration, except assigning its default value.
Bicep Variables
While the parameters accept values from outside, variables define the values to be used inside the template. The variables are defined like below. We can use all of existing ARM template functions to handle strings. But as Bicep supports string interpolations and ternary conditional operators, we can replace many concat() functions and if() functions with them (line #2-3).
  var metadata = {
    longName: '{0}-${name}-${locationCode}${coalesce(suffix, '') == '' ? '': concat('-', suffix)}'
    shortName: '{0}${replace(name, '-', '')}${locationCode}${coalesce(suffix, '') == '' ? '' : suffix}'
  }

  var storageAccount = {
    name: replace(metadata.shortName, '{0}', 'st')
    location: location
  }
Note that, unlike the parameters, the variables use the equal sign (=) because it assigns a value to the variable.
Bicep Resources
Bicep declares resources like below.
  resource st 'Microsoft.Storage/storageAccounts@2017-10-01' = {
    name: storageAccount.name
    location: storageAccount.location
    kind: 'StorageV2'
    sku: {
      name: 'Standard_LRS'
    }
  }

  resource vm 'Microsoft.Compute/virtualMachines@2018-10-01' = {
    name = resourceName
    location = resourceLocation
    ...
    properties: {
      ...
      diagnosticsProfile: {
        bootDiagnostics: {
          enabled: true
          storageUri: st.properties.primaryEndpoints.blob
        }
      }
    }
  }
There are several things worth noting.
- The format to declare a resource is similar to the parameter. The parameter declaration looks like
param <identifier> <type>. The resource declaration looks similar to resource <identifier> <type>.
- However, the resource type section is way different from the parameter declaration. It has a definite format of
<resource namespace>/<resource type>@<resource API version> (line #1).
- I prefer to using the
providers() function as I can’t remember all the API versions for each resource.
- But using the
providers() function is NOT recommended. Instead, the API version should be explicitly declared. To find out the latest API version, use the following PowerShell command.
  $resourceType = @{ Label = "Resource Type"; Expression = { $_.ResourceTypes[0].ResourceTypeName } }
  $apiVersion = @{ Label = "API Version"; Expression = { $_.ResourceTypes[0].ApiVersions[0] } }
  Get-AzResourceProvider `
      -ProviderNamespace  `
      -Location  | `
      Select-Object $resourceType, $apiVersion | `
      Sort-Object -Property "Resource Type" | `
      Where-Object { $_."Resource Type" -eq "" }
- Bicep automatically resolves the dependencies between resources by using the resource identifier.
- For example, the Storage Account resource is declared first as
st, then st is referred within the Virtual Machine declaration (line #19).
- On the other hands, in the ARM template world, we should explicitly declare resources within the
dependsOn attribute to define dependencies.
You might have found an interesting fact while authoring Bicep file.
- ARM templates should rigorously follow the schema to declare parameters, variables and resources. Outside its respective section, we can’t declare them.
- On the other hands, Bicep is much more flexible with regards to the location where to declare parameters, variables and resources.
- We can simply declare
param, var and resource wherever you like, within the Bicep file, then it’s automagically sorted out during the build time.
Bicep Installation and Usage
As mentioned above, Bicep has just started its journey, and its version is v0.1, meaning there are a lot of spaces for improvements. Therefore, it doesn’t have a straightforward installation process. But follow the installation guide, and you’ll be able to make it. Once the installation completes, run the following command to build the Bicep file.
bicep build ./azuredeploy.bicep
Rough Comparison to ARM Template Authoring
Let’s compare the result between the original ARM template and Bicep-built ARM template. Both work the same, but the original file has 415 lines of code while Bicep-generated one cuts to 306 lines of the code. In addition to this, Bicep file itself is even as short as 288 lines of code. If I refactor more by simplifying all the variables, the size of the Bicep file will be much shorter.
So far, we have had a quick look at the early preview of the Bicep project. It was pretty impressive from the usability point of view and has improved developer experiences way better. Interested in trying out Bicep? You can take a first look with the Bicep Playground!
This article was originally published on Dev Kimchi.

Recent Comments