
This article is contributed. See the original author and article here.
Although, you can use Text based controls to represent data as is in a Canvas Power App. So why not go an extra mile to make it look more intuitive.
Scenario
Let’s say there are Accounts and you have some kind of Compliance Ratings on them to represent compliant they are based on certain criteria. Could be a Numeric value or Decimal value. But Rating Control represents only in Numeric i.e. Whole Numbers.
So, for this example, I’m using a Rating field which is of type Whole Number in Dynamics 365 on Account entity.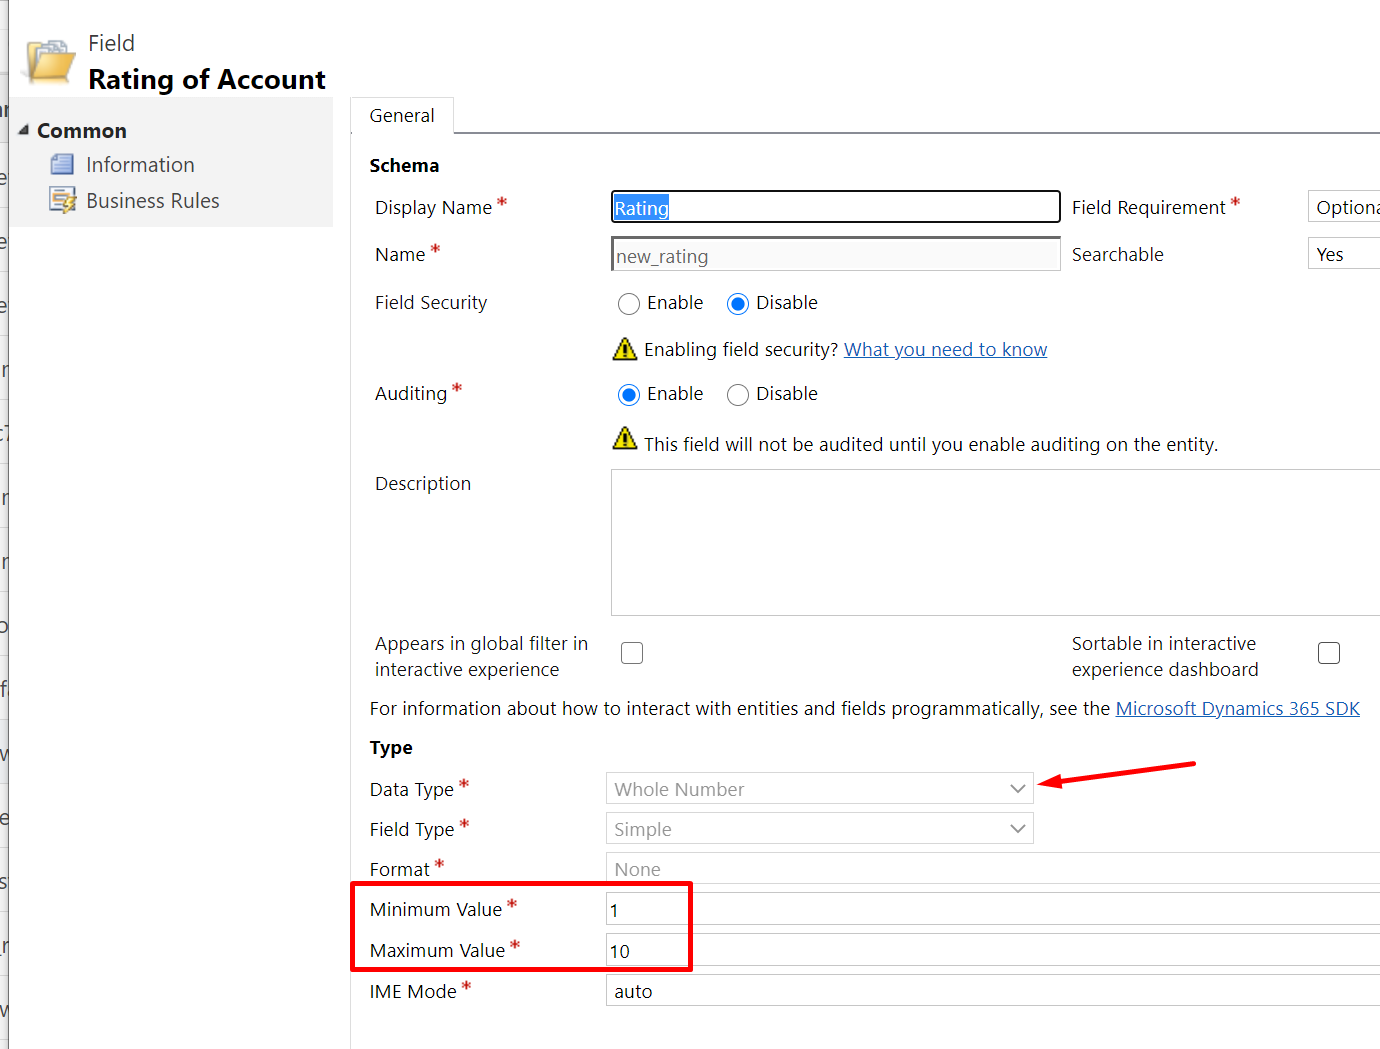
And the complete Dataset looks like this in Dynamics 365 / Dataverse.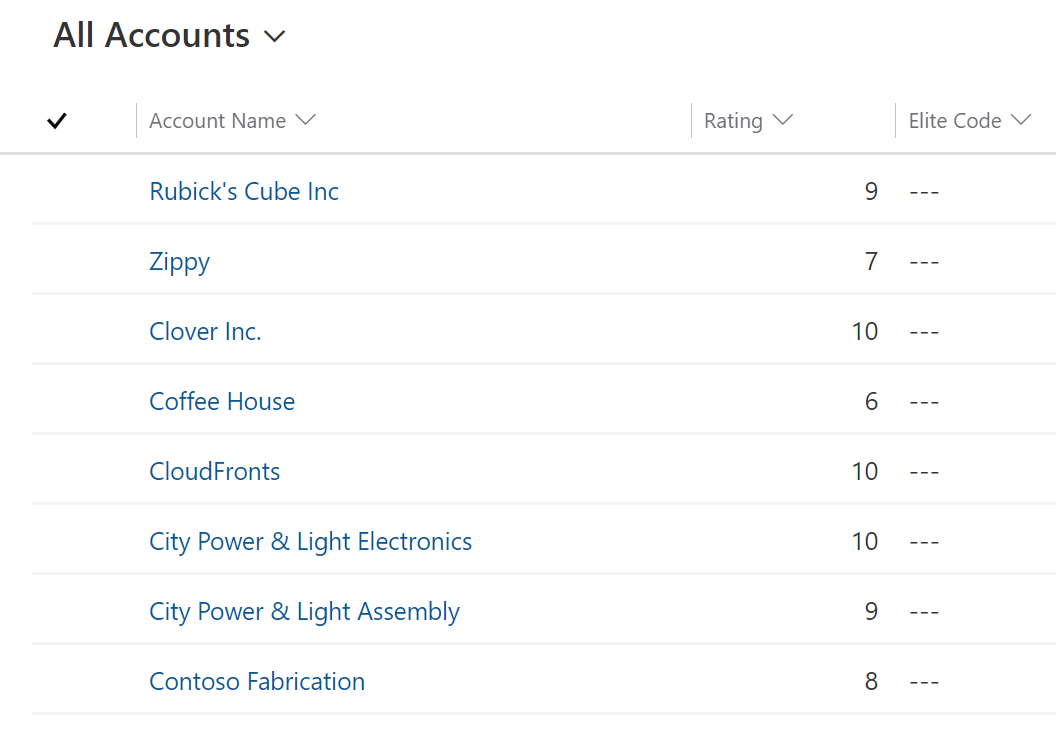
Note: I tried with Decimal but it rounded the values hence, sticking to Whole Number.
Rating Control
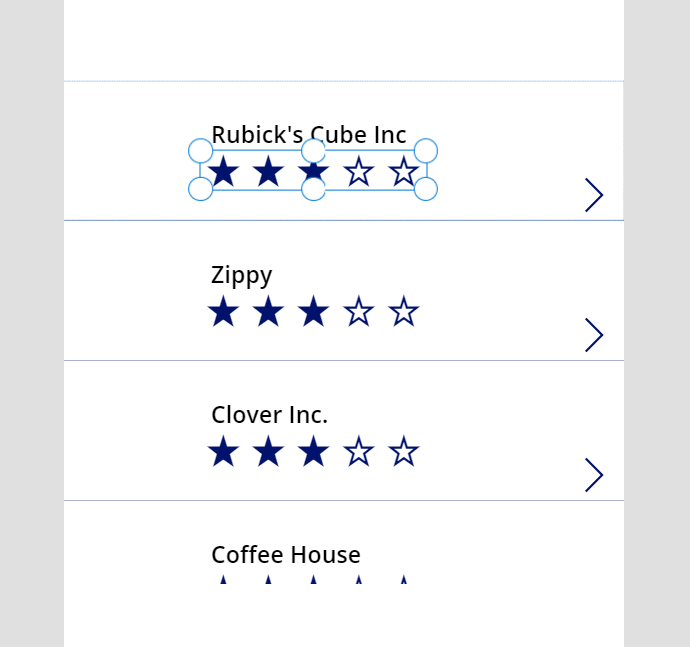
- Let’s say below is the Gallery and you want to show Ratings in the form of stars instead of traditional numeric values.

- Now, let’s use Rating Control below the Names of the Accounts to show the Rating values. Select the first Row once you connect to the Common Data Service i.e. CDS / Dataverse Data Source and select the entity you want to populate it with. In this example, we are using Accounts. So my Gallery is populated with Accounts records.
Select the first record and navigate to Insert tab and look for Input controls as shown below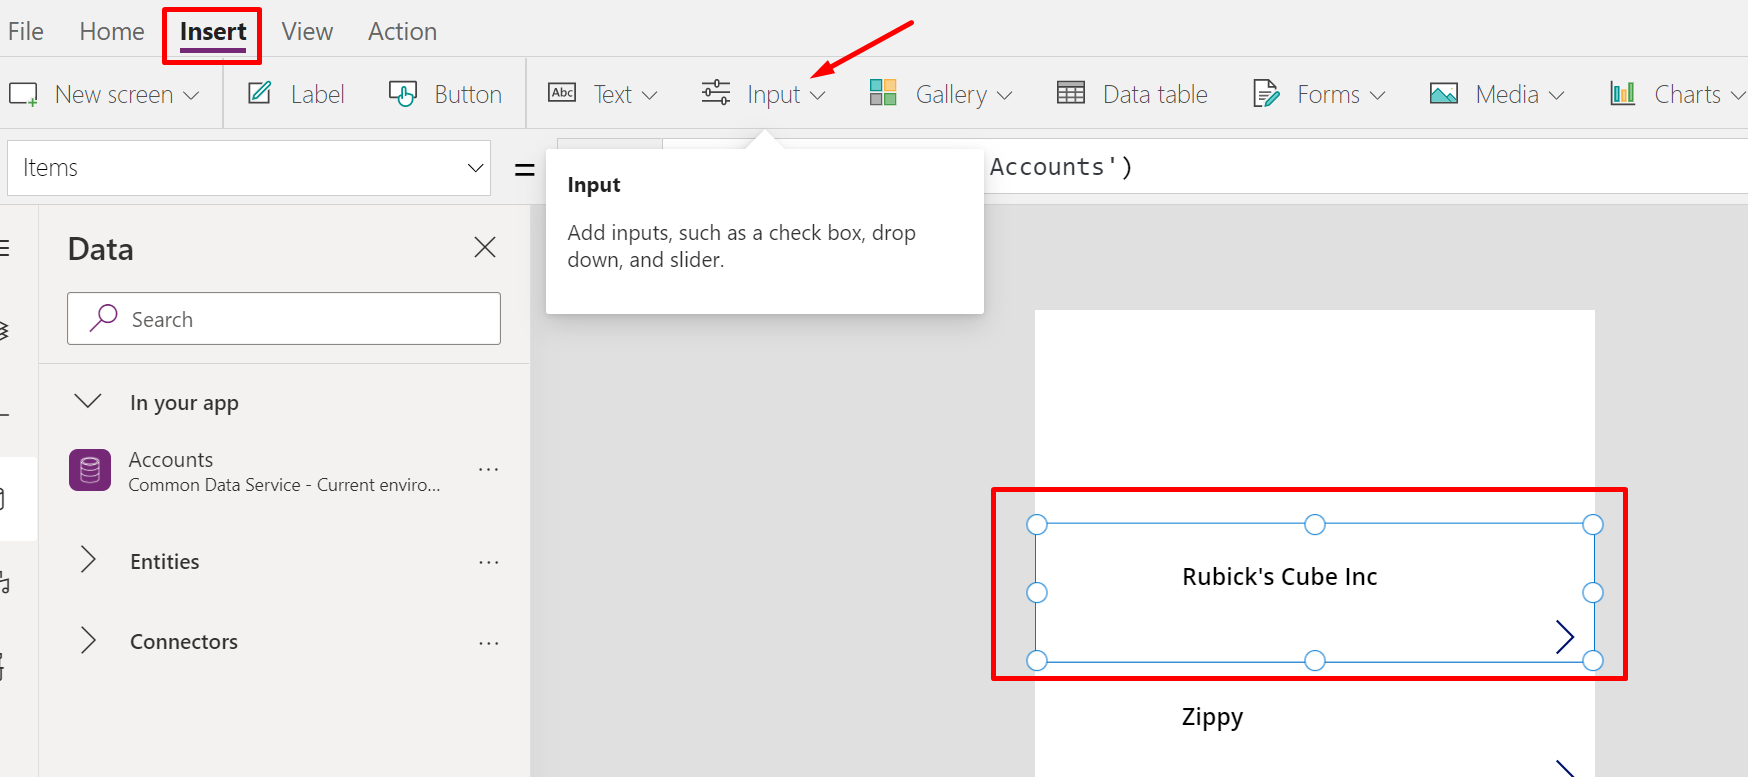
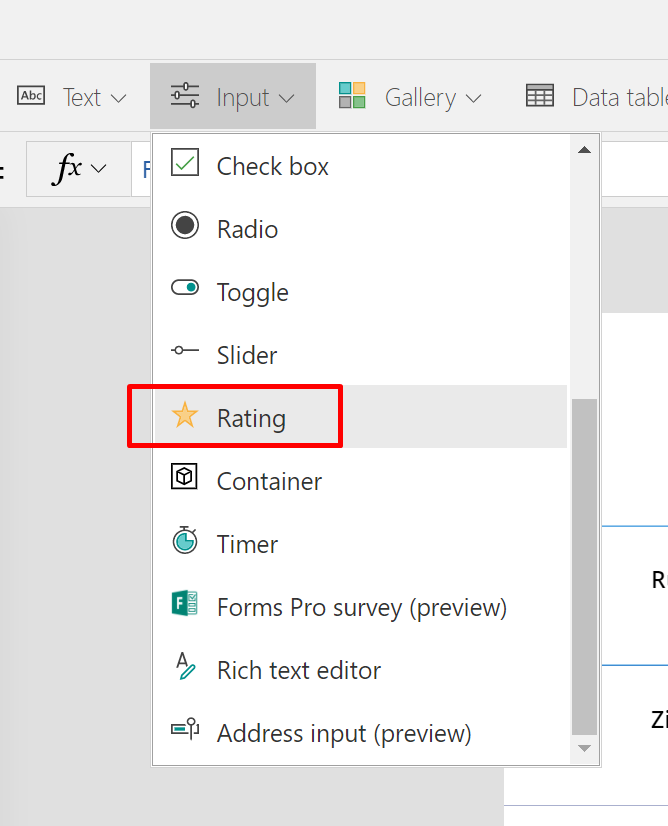
Now, look for Rating control.
- Once you select Rating, it’ll appear iteratively since it’ll be applied “For Each” of these records in your Gallery control.
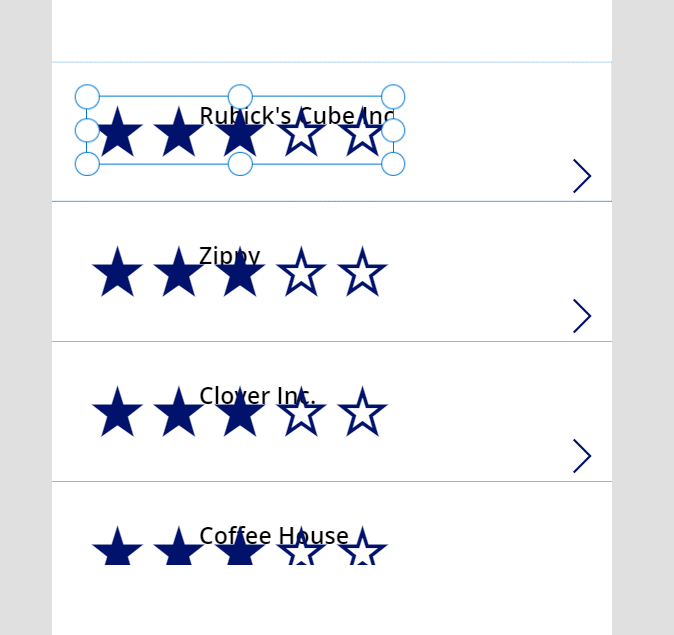
- I’ve just rearranged them under the name to make them look proper.
- Let’s make it Read Only by changing the behavior, so that the Users don’t accidently touch and set a value during Runtime. Although, this won’t affect the actual data but the representation will be incorrect in that case.

- Also, the Max will represent the length of your Rating whereas the Default value are kept to 0 in case the field value is not set at Source. (I think 1 would still be misrepresenting)

- Now, I’ll connect this Control to the Data Source’s field i.e. Rating field on the Account entity that represents the Rating value.
On the Default, I’m setting ThisItem.Rating where ThisItem represents the Row of the Account i.e. the Account record itself and Rating is the field in Dynamics 365’s Account entity which we saw in the scenario above.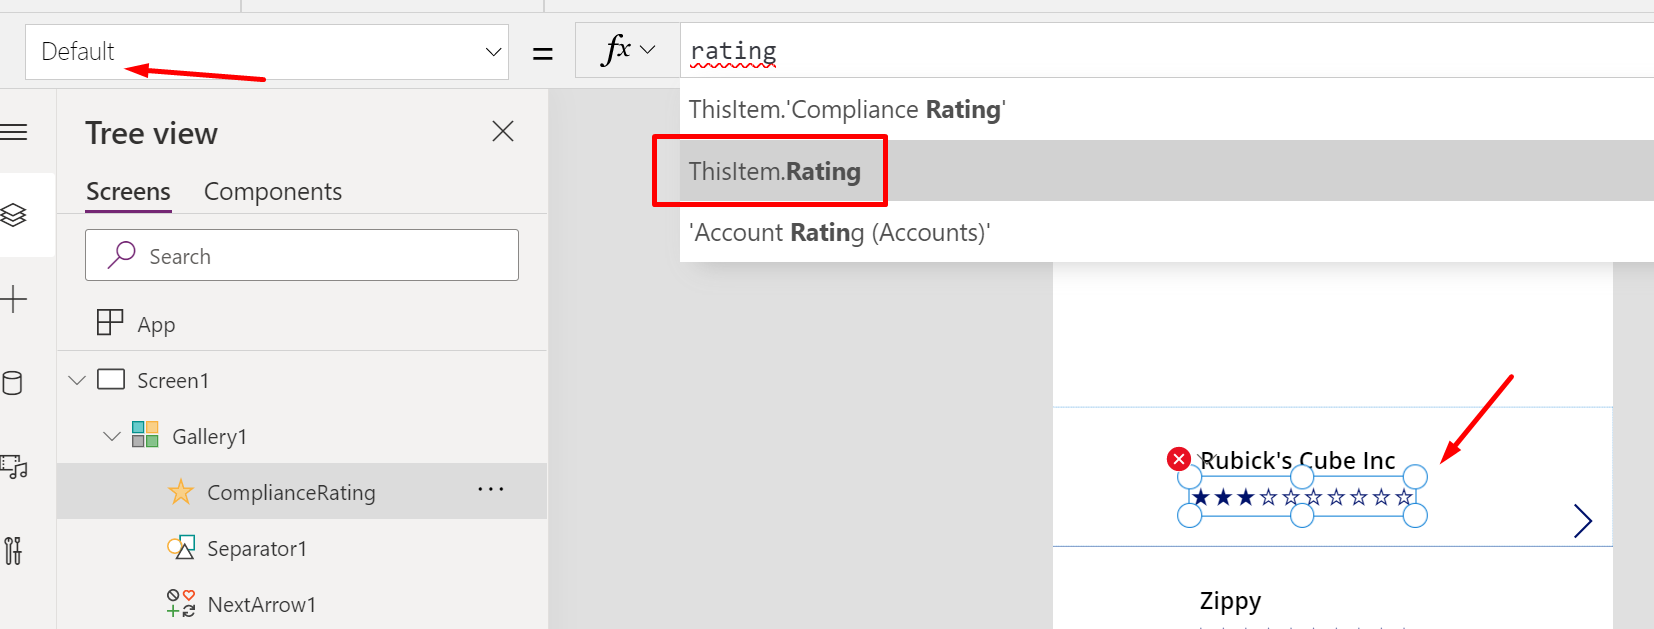
- And that’s it. You can Save and Publish your App and Run it.
Rating values
Now that we’ve added the Rating Control, let’s Run our App and see how it represents the data from your Accounts entity.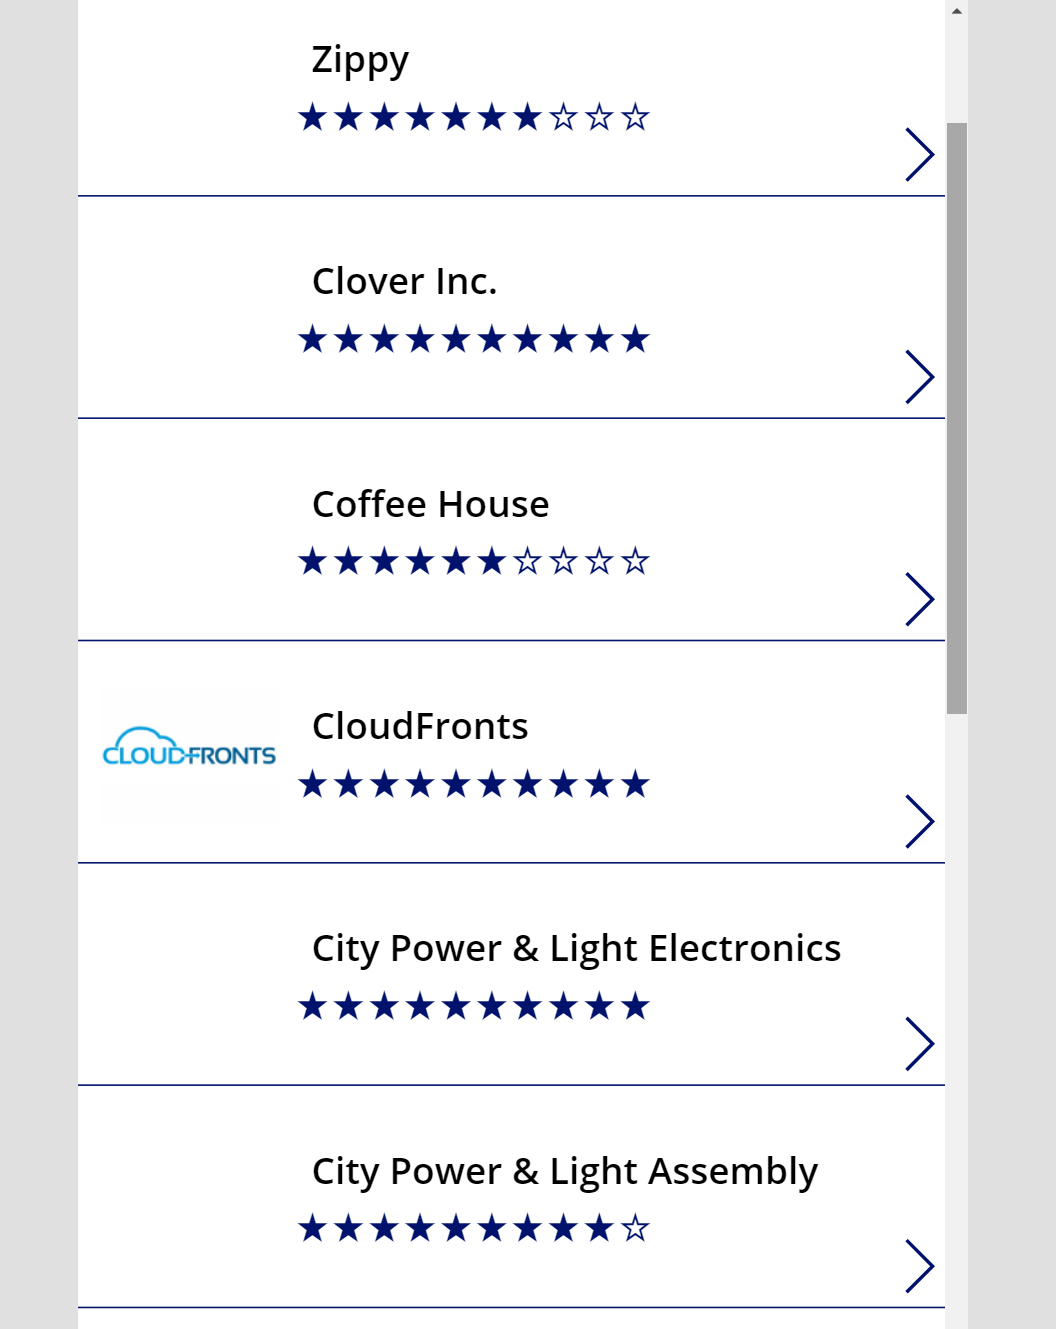
And the Ratings represent the below data – 
Hope this was useful!
Here are some more Canvas Power Apps posts you might want to check –
- Clear a field value & Reset Form in a Canvas Power App [Quick Tip]
- Get Dynamics 365 field metadata in a Canvas App using DataSourceInfo function | Common Data Service
- Debug Published Canvas Power App with other users using Monitor | Power Platform
- Download a File from a Canvas Power App using a button | Power Platform
- AddColumns() function to dynamically add columns to a Data table in Canvas Power App | SharePoint List
- Implement real-time search in Gallery of CDS records in a Canvas Power App | Power Platform
- Implement character length validation in a Canvas Power App | Power Platform
- Log Canvas Power App telemetry data in Azure Application Insights | Power Apps
- Call HTTP Request from a Canvas Power App using Flow and get back Response | Power Automate
- Send a Power App Push Notification using Flow to open a record in Canvas App | Power Automate
- Dependent OptionSets in a Canvas Power App for 1:N related CDS entities | Power Platform
- Restore older version of a Canvas Power App | Power Platform
Thank you!!
Brought to you by Dr. Ware, Microsoft Office 365 Silver Partner, Charleston SC.

Recent Comments