This article is contributed. See the original author and article here.
Earlier today we announced a new set of capabilities for Microsoft Defender for Endpoint that empower organizations to discover and secure network devices and unmanaged endpoints. This is especially critical in the new global hybrid working environment, which exposes the most challenging cybersecurity landscape we’ve ever encountered.
The challenge: unmanaged network devices
We know that users are 71% more likely to be infected on an unmanaged device and connecting from these devices to business networks from offers a high value target for attackers to launch broader attacks from. In recent years, we witnessed several cases where security vulnerabilities in networking gear were actively exploited in the wild by cybercriminals. In some cases, this meant that attackers had the capability to access computers connected directly to corporate networks from the internet (such as CDPwn, EternaBlue, EternalRed).
From a vulnerability management standpoint, the large number of unmanaged network devices deployed in each organization creates a large surface area of attack, representing a significant risk to the entire enterprise. These network devices must be secured and included in each organization’s vulnerability management program. The first step is for an organization to make sure that every network device is discovered, accurately classified, and added to asset inventory.
Network device discovery in Defender for Endpoint
Defender for Endpoint customers can now take advantage of the new network discovery capabilities available in the Device inventory section of the Microsoft 365 security center and Microsoft Defender Security Center consoles. To do so a designated Microsoft Defender for Endpoint device will be used on each network segment to perform periodic authenticated scans of preconfigured network devices. Once discovered, Defender for Endpoint’s threat and vulnerability management capabilities provide integrated workflows to secure discovered switches, routers, WLAN controllers, firewalls, and VPN gateways.
Vulnerability management for network devices
After the network devices are discovered and classified, security administrators will be able to receive the latest security recommendations and review recently discovered vulnerabilities on network devices deployed across their organizations.
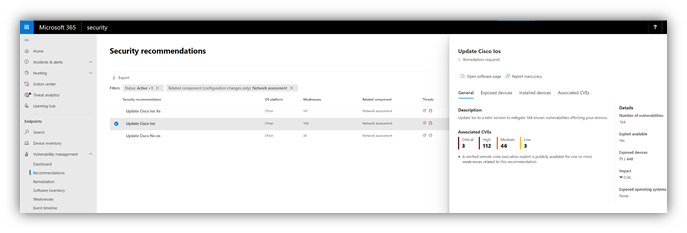
Figure 1: Security recommendation to update Cisco operating systems that run on routers, switches, and WLAN controllers
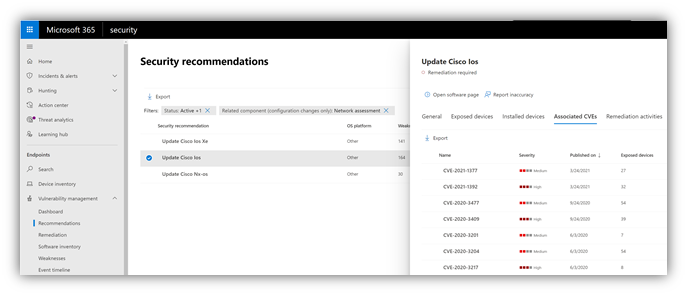
Figure 2: Security recommendation details with all vulnerabilities associated with the Cisco IOS operating system
Solution approach
Network devices are not managed as standard endpoints since Defender for Endpoint does not have a sensor built into the network devices themselves. These types of devices require an agentless approach where a remote scan will obtain the necessary information from the devices. Depending on the network topology and characteristics, a one or more Windows devices onboarded to Microsoft Defender for Endpoint will perform authenticated scans of network devices using SNMP (read-only).
OS coverage for vulnerability assessment
Currently, the following operating systems are supported:
- Cisco IOS, IOS-XE, NX-OS
- Juniper JUNOS
- HPE ArubaOS, Procurve Switch Software
- Palo Alto Networks PAN-OS
Note: Support for additional networking vendors and operating systems will be added over time, based on data gathered from customer usage. Therefore, you are encouraged to configure all your network devices, even if they are not specified in this list.
How to get started
Your first step is to select a device that will perform the authenticated network scans.
- Allocate an assessment device (client or server) that has a network connection to the management port for the target network devices. This can be any Windows device that has been onboarded to Defender for Endpoint. Note: SNMP traffic between the Defender for Endpoint assessment device and the target network devices must be allowed (e.g., by the organization’s firewall).
- Decide which network devices will be assessed for vulnerabilities (e.g., a Cisco switch or a Palo Alto Networks firewall).
- Make sure SNMP read-only is enabled on all configured network devices to allow Defender for Endpoint assessment device to query the configured network devices. Note: ‘SNMP write’ is not needed for the proper functionality of this feature.
- Obtain the IP addresses of the target network devices to be scanned (or the subnets where these devices are deployed).
- Obtain the SNMP credentials of the target network devices (e.g., Community String, noAuthNoPriv, authNoPriv, authPriv). You’ll be required to provide these when configuring a new assessment job.
- Proxy client configuration: No additional configuration is required other than the Defender for Endpoint device proxy requirements.
- The following domains/URLs should be allowed/enabled in your firewall/proxy rules. This is essential to allow the network scanner to be authenticated and work properly. Note: The following user permission option is required to configure assessment jobs: ‘Manage security settings in Security Center’.
login.windows.net
*.securitycenter.windows.com
login.microsoftonline.com
*.blob.core.windows.net/networkscannerstable/*
Install the network scanner
1. In the Microsoft 365 security center console, go to Settings > Endpoints > Assessment jobs page.
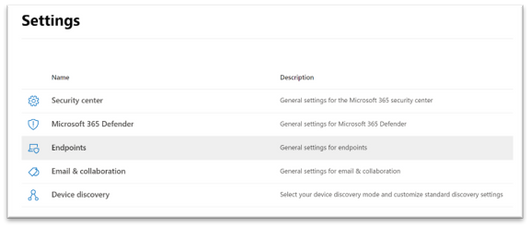
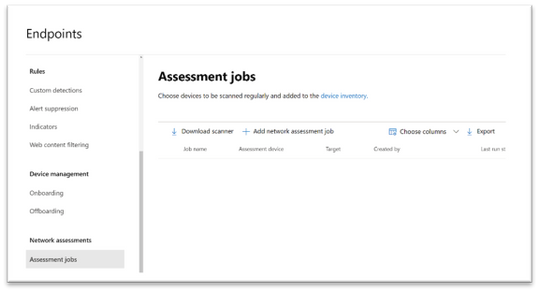
2. Download the network scanner and install it on the designated Defender for Endpoint assessment device.
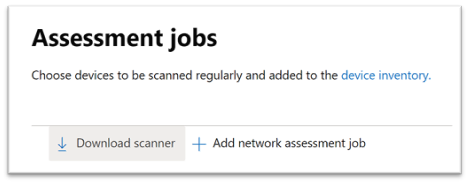
3. Network scanner installation & registration:
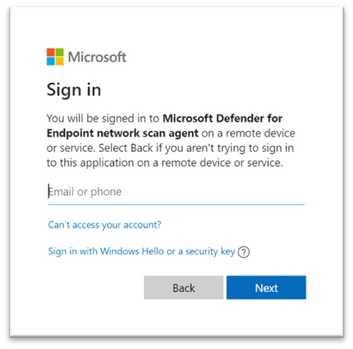
- Sign in using a Microsoft account that has the Defender for Endpoint permission called “Manage security settings in Security Center.”. The sign-in process can be completed on the assessment device itself or any other device (i.e., your personal client device).
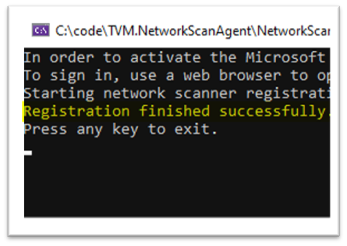
- To complete the network scanner registration process, copy and follow the URL that appears on the command line, and use the provided installation code to complete the registration process. Note: You may need to change Command Prompt settings to be able to copy the URL.
Enter the code here:
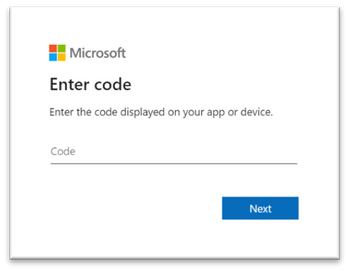
Use your Microsoft account with the required threat and vulnerability management permissions to sign in.
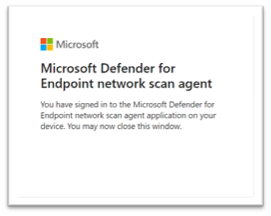
When finished, you should see the following messages in your browser and CMD that state that you have signed into the Microsoft Defender for Endpoint network scan agent application successfully:
Configure a new network assessment job
1. In the Microsoft 365 security center console, go to Settings > Endpoints > Assessment jobs page.
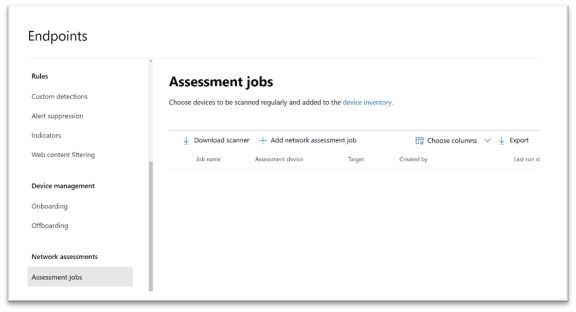
2. Add a new network assessment job.
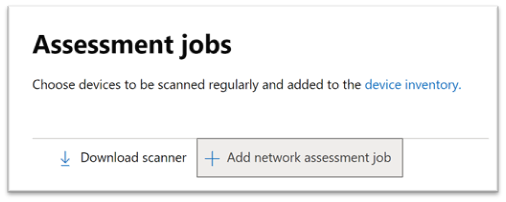
3. Follow the set-up flow:
- Choose an ‘Assessment job’ name and the ‘Assessment device’ on which the network scanner was installed. This device will perform the periodic authenticated scans.
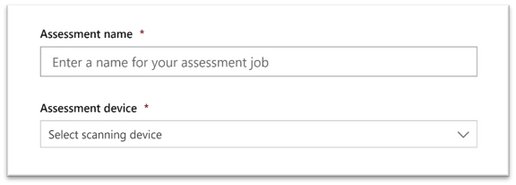
- Add IP addresses of target network devices to be scanned (or the subnets where these devices are deployed).

- Add required SNMP credentials of the target network devices.
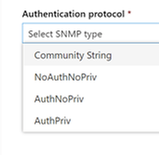
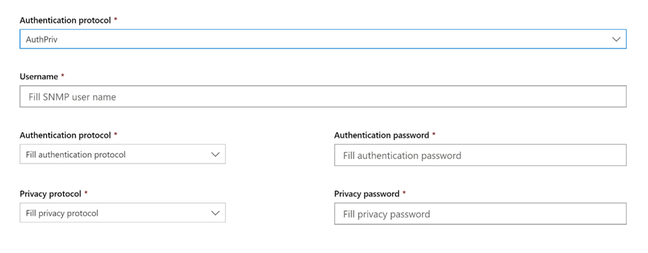
- Save the newly-configured network assessment job to start the periodic network scan.
Scan and add network devices
In the set-up flow, you can perform a one-time test scan to verify that:
- There is connectivity between the Defender for Endpoint assessment device (network scanner) and the configured target network devices.
- The configured SNMP credentials are correct.
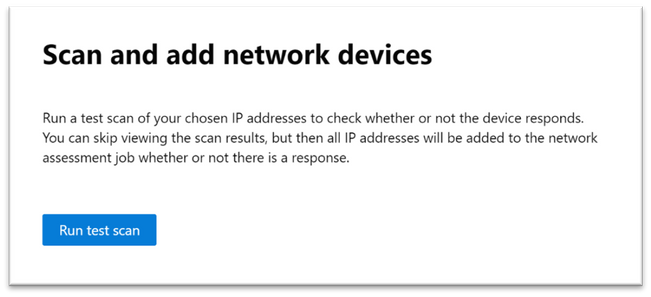
Once the results show up, you can choose which devices will be included in the periodic scan. If you skip viewing the scan results, all configured IP addresses will be added to the network assessment job periodic scan (regardless of the device’s response).
TIP: The scan results can also be exported.
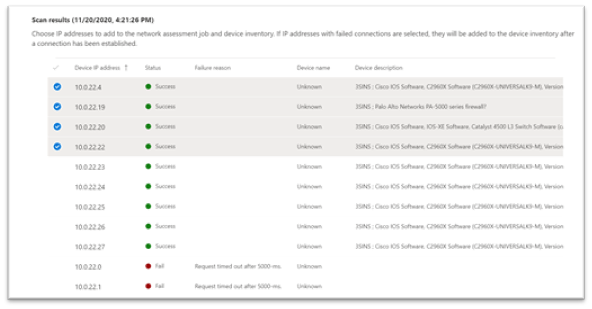
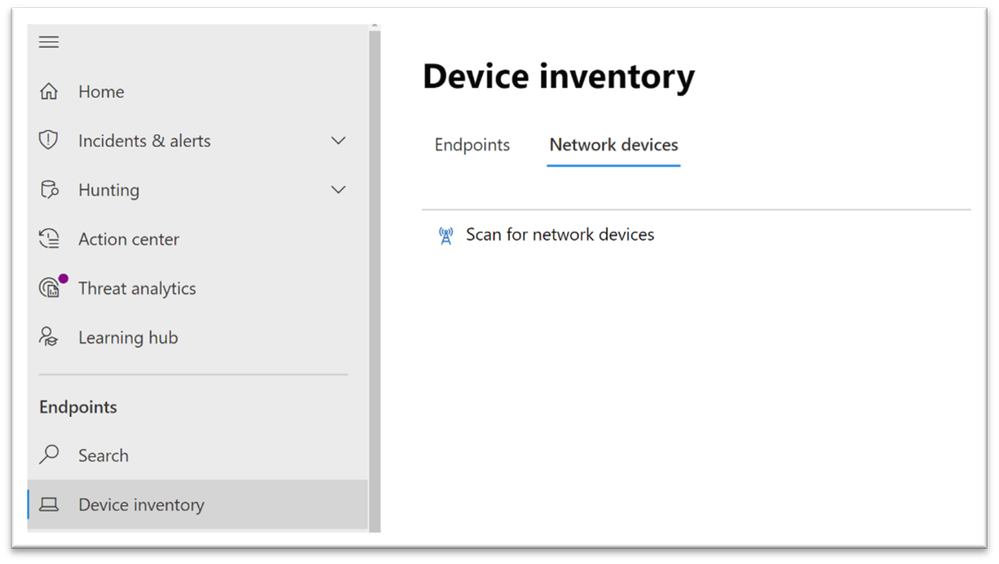
Newly-discovered devices will be shown under the new Network devices tab in the Device inventory page (it may take up to ~2hrs after adding an assessment job until the devices are updated).
Thank you for your interest in the network devices discovery and vulnerability management feature. We encourage you to join us in the public preview program. This program lets you test new features in their early phases and enables you to provide feedback that will influence the final product. For those not already enrolled in the program, we encourage you to do so by turning on the preview features. Once enrolled, we look forward to seeing your feedback at: TVM@microsoft.com.
More information about this feature and our broader range of unmanaged devices capabilities can be found in the Microsoft Defender for Endpoint product documentation.
Brought to you by Dr. Ware, Microsoft Office 365 Silver Partner, Charleston SC.


Recent Comments