This article is contributed. See the original author and article here.
This is already the third part of my little series on what it takes to do the Microsoft Graph Fundamentals Learning Path on Microsoft Learn. If you missed part 1 or part 2, it would be a good idea to catch up first, as the parts build upon each other.
After we already saw how easily we could configure a JavaScript application to retrieve Microsoft 365 data using Microsoft Graph in the last module, we will focus this time on how to access user photo information by using Microsoft Graph.
This module is supposed only to take 17 minutes to complete – timer set :smiling_face_with_halo:.
intro
Our goal is to insert a user profile in our app that we already used in the last module. We will need to authenticate our user using Microsoft identity and receive an access token and call Microsoft Graph API with this token. – If you now wonder, ‘wait, but why?’ it’s a good idea to reread part 2 of my summary or do the last module.
After making us aware of WHY we should display a user picture, we learn that there are several ways to get profile picture information with Microsoft Graph, for example
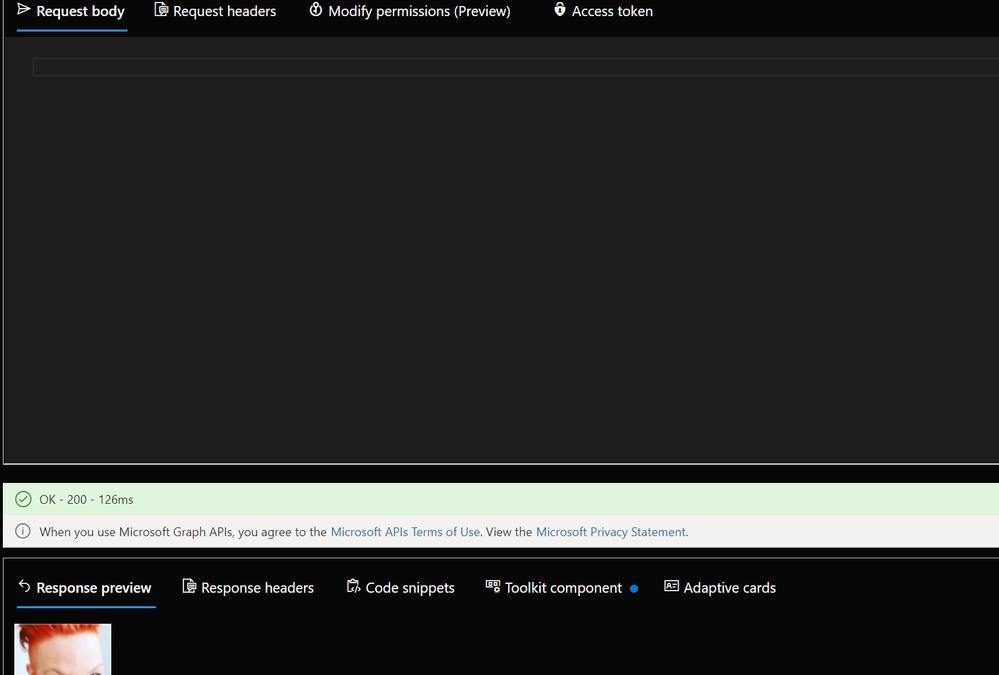
`GET https://graph.microsoft.com/v1.0/me/photo/$value` gets us the image of the signed-in user itself. I used the Graph Explorer to check that:

Let’s do an exercise:
Exercise – Use Microsoft Graph in your web application to retrieve a user’s profile photo
build upon module 2
As we are building upon the last module, we will not need to clone the repository again. The unit quickly walks us through the four primary files for our app `index.html`, `auth.js`, `graph.js` and `ui.js` to make us aware of what they will do and repeats the steps we did in module 2 to insert tenant ID and application ID.
Now the new part
1. copy – paste two code snippets into the `index.html` file to create and style a button with an image element
2. add a function to the `graph.js` file to call Microsoft Graph API and retrieve the photo of the signed-in user
3. add a function to the `ui.js` file that displays the image that we got from Graph into the image element that we created and styled in step 1
4. copy-paste a snippet to show a button that a signed-in user can click on to view their profile picture.

time to run our app
Like in Module 2, open your terminal (I use the built-in Powershell in Visual Studio Code) and type in `npm start`, which will open your browser with `localhost:8080`.
* Click on **Sign in with Microsoft**
* Click the `show profile picture` button
* see that profile pic? YAY – time for a happy dance- You made it!

conclusion
As I did module 2 just a couple of days before, I did not need to reinvent the wheel, and it took me way less than 17 minutes to complete this module 3 – but I realized that I could reuse this app over and over again to whenever I need to sign-in a user or want to display information that I can get from Microsoft Graph API.
I wrote this summary of the whole learning path because I worked with Microsoft Graph before, and although I don’t write (a lot) of code daily, these modules felt doable – even if you are not a super experienced developer. I hope there will be even more cool content!
If you now read this and wonder if you could build applications with Microsoft Graph as well: Yes, you can! To learn more – from developers, please join Microsoft’s Learn Together event: Building apps with Microsoft Graph on April 14!
I would love to hear your feedback! Did you start this learning path? Or completed it? What were your aha moments? Where did you struggle? What content is now needed to take you to the next level? Please comment below!
🦒
Brought to you by Dr. Ware, Microsoft Office 365 Silver Partner, Charleston SC.

Recent Comments