This article is contributed. See the original author and article here.
Introduction
This is John Barbare and I am a Sr Customer Engineer at Microsoft focusing on all things in the Cybersecurity space. In this tutorial I will walk you through the steps of enrolling a Windows Device in Microsoft Endpoint Manager (MEM) and the newly released Android enrollment policy. In previous blogs, I have stated that one has already enrolled the device and to follow certain steps for a particular security policy. Certain feedback has suggested including detailed onboarding/enrollment. With that said, this blog will cover the entire Windows device enrollment process through MEM.
An overview of MEM can be described as a cloud solution platform that unifies several technologies. It is not a new license. The services are licensed according to their individual license’s terms. For more information, see the product licensing terms.
If you currently use Configuration Manager, you also get Microsoft Intune to co-manage your Windows devices. For other platforms, such as iOS/iPadOS and Android, then you will need a separate Intune license. In most scenarios, Microsoft 365 may be the best option, as it gives you Endpoint Manager, and Office 365. For more information, see Microsoft 365.
Device Enrollment in MEM
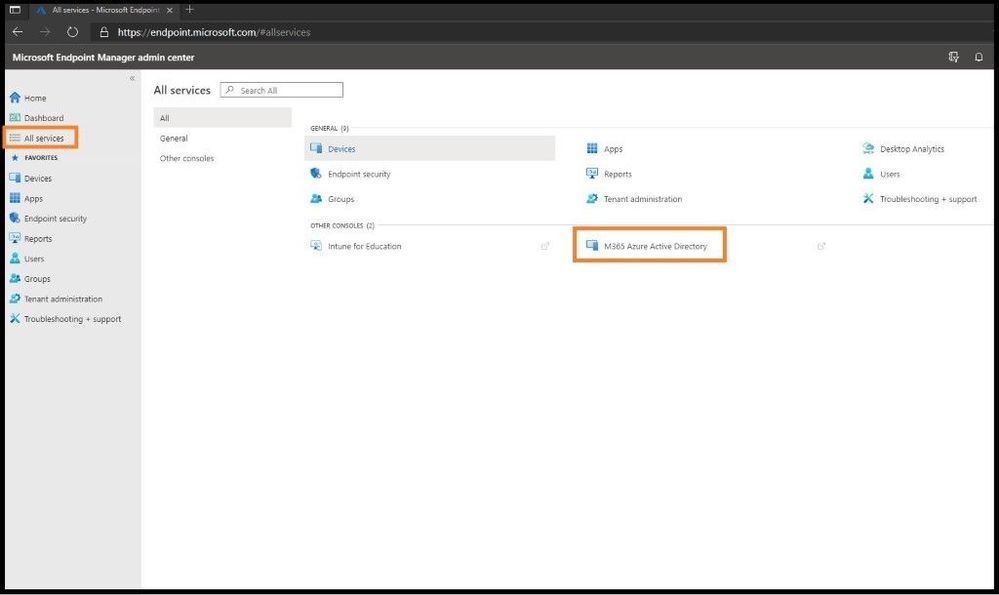
The first item you want to do is enroll your device using Windows 10 automatic enrollment. This can include a corporate issued laptop and/or a bring your own device. Go ahead and sign into https://endpoint.microsoft.com as a Global Administrator so you will have all the necessary permissions. Once on the home dashboard page, navigate to All Services and then M365 Azure Active Directory.
Selecting M365 Azure AD

Azure Active Directory will open in a separate window and scroll down until you locate Mobility (MDM and MAM) and select the text. Two primary applications should be listed, which are Microsoft Intune and Microsoft Intune Enrollment. If the applications are not shown, go ahead and select + Add Application to add them. Next, select Microsoft Intune.
MDM and MAM

Select Some from the MDM user scope (in the middle) to use MDM auto-enrollment to manage enterprise data on your employees’ Windows devices. MDM auto-enrollment will be configured for AAD joined devices and bring your own device scenarios. Next, select the groups you want to configure for Auto Enrollment. A fly out window will appear on the right and select the group(s) for this Auto Enrollment. Next, select some for the MAM user scope and select the MDM user group(s) to be added.
Configure Auto Enrollment

Leave the rest of the default configurations for the rest of the values and select save.
Confirming the Version of Your Windows Machine You are Enrolling
Select the Windows icon on the bottom left side of your window and type WINVER and press enter. Confirm you are running at least Windows 10 Version 1607 and higher.
Checking version of WIN 10

Enrolling the Windows 10 Machine
Select the Windows icon on the bottom left side of your window and type settings and press enter. Select the Accounts Tab.
Account Settings

On the left-hand side, select Access work or school and select the + Connect button in the middle of the screen.
Adding Work or School Account

During the stages of enrollment, you will see multiple screens with one asking for your work or school email. Go ahead and enter your email and select next. During this process it is connecting and synchronizing to MEM and applying any policies that your work or school has applied to the users and/or groups.
Enter Email

When prompted, enter your credentials used to login.
Sign in Page with Password

At the end, select “Got it” to finish the sync process.
Setting up the Device

As one can see, the account was successfully added as seen below via MDM.
Account Added

Confirming Enrollment in MEM
Head back over to the Microsoft Endpoint Manager admin center and one will land back on the home page. Select the Devices tab on the left and then All Devices. You should see the device you just enrolled in MEM with the matching device name and timestamp (last check in time) to verify. Also, you will see under the Managed by header will be Intune. Since the machine I enrolled in MEM is not compliant per a policy I pre-created and applied in MEM, one can see it is marked as non-compliant. If the device is 100% compliant per your work or school polices, it will show a green check mark under the compliance category.
Device Added but not Compliant

Non-Compliant Enrolled Devices
From an Admin’s perspective to see what is not compliant in the newly enrolled device, one will want to investigate further what is out of compliance. This could be the Antivirus version is not up to date, the last Antivirus scan is overdue, the Windows version is not above a certain version, or any policy that your organization deems compliant. You will be notified and be able to see it in this view. To see what policies are making this device or your device non-compliant, click on the non-compliant device that has a red exclamation mark.
Selecting Added Machine

This will take us to the main dashboard of the device you onboarded and all the settings for the device. On the left-hand side, click on the Device compliance tab to see what policy is making the device not compliant. Next, click on any policy that is in a not compliant state as seen below.
Selecting the Non-Compliant Policy

The WIN 10 2020 Later policy is the policy I created for all my Windows devices. When this particular device was enrolled and this policy was applied, it did not meet the strict policy standards I created in the policy.
After clicking on the WIN 10 2020 Later policy that was applied to my device, I can see all the policy settings and what is not compliant out of the seven polices as seen below. The particular policy that is not compliant is shown in red with a X which is “Require the device to be at or under the machine risk score”. I have my policy set to be at a certain level/threshold of risk as any Administrator will want to know if the device falls to a level that is not acceptable per company policy.
Selecting the Specific Setting

To see how to fix this issue, we will go to the WIN 10 2020 Later policy and view the properties. By selecting Devices on the far-left side, then Compliance policies, and then the WIN 10 2020 Later policy, it will bring me to the actual policy with all the settings inside the policy.
Compliance Policies Page

By clicking on the properties tab, one can see all the settings for the policy in question and what needs to be fixed on the device to be compliant per your organization. One can see for the “Require the device to be at or under the machine risk score” is set to low.
Viewing What is out of Compliance

Since the machine is higher than low according to Microsoft Defender ATP, I will go over and investigate why it is not low and make sure to bring it down to an acceptable risk level of low to be compliant per my organization’s policy. Once this is done, the device will show as compliant in the future unless any of the policies I have applied do not meet the thresholds set inside the MEM portal and policies which were created.
One can always select the Dashboard tab on the main left column to see a snapshot of device enrollment, compliance, configuration, and the status of your enrolled devices. One can also see the device configuration profile status with user and device trends.
Viewing Dashboard with Information

Android Enrollment for Corporate Owned Devices with a Work Profile Issue
With then new preview feature of Android Enrollment for Corporate owned devices with a work profile, one must take some extra steps, or the device will not be able to enroll. As of this writing, the Dev Team states with an update to the known issues section regarding enrollment and the “Updating Device” screen, a fix will be rolled out very soon. Until then, follow the below steps. One needs to create a specific Android configuration profile related to Android Enterprise with Device restrictions or else the device will fail. This includes Corporate owned dedicated devices, Corporate owned fully managed user devices, and Corporate owned devices with a work profile. The following steps will ensure your Android Enterprise Device will be successful. Select Devices on the far left and then Android.
Android Device

Select Configuration profiles and then + Create profile at the top. For Platform, select Android Enterprise and for Profile select Device restrictions and then select create.
Selecting Device Restrictions

Go through the steps in the configuration settings according to your corporate environment and then apply to the necessary groups for the policy to apply.
Viewing Configurations Before Applying

Conclusion
Thanks for taking the time to read this blog and I hope you had fun reading how to set up automatic enrollment for Windows 10 devices and also Corporate owned Android devices using the MEM console. The next blog I will show you how to setup and deploy Microsoft Defender ATP using only the MEM dashboard for your enrolled devices without having to download the package (agent) from Microsoft Defender ATP. Hope to see you in the next blog and always protect your endpoints!
Thanks for reading and have a great Cybersecurity day!
Follow my Microsoft Security Blogs: http://aka.ms/JohnBarbare and also on LinkedIn.
References
- Enroll Devices in Microsoft Intune
- Intune announcing public preview for Android Enterprise corporate-owned devices with a work profile
You may also like:
Brought to you by Dr. Ware, Microsoft Office 365 Silver Partner, Charleston SC.

Recent Comments