This article is contributed. See the original author and article here.
In this blog post, we have invited Shriram Natarajan (Senior Program Manager, Azure Stack Hub) to walk us through how to interact with Azure Stack Hub using REST APIs.
Microsoft Azure cloud provides a robust platform for developers and operators to build and deploy their solutions seamlessly to the public cloud, the regional clouds as well as to Azure Stack Hub on-premises solutions. This ease of management is enabled by the consistent APIs, provided by the Cloud services available across all of these instances. Each cloud is fronted by the Azure Resource Manager (ARM) which simplifies the manage of application resources, enabling you to repeatedly deploy applications, with confidence that the resources are deployed in a consistent state. Azure Resource Manager makes it easy for you to manage and visualize resources in your app. You no longer have to deploy parts of your app separately and then manually stitch them together. You put resources with a common lifecycle into a resource group that can be deployed or deleted in a single action. You can see which resources are linked by a dependency. You can apply tags to resources to categorize them for management tasks, such as billing. On Azure Stack Hub, ARM is available for the cloud Operators as well to manage the cloud easily and ensure high availability to their customers.
Azure has robust tooling with SDKs in a variety of languages to help customers interact with the ARM APIs wherever they are. These tools are the recommended way to interact with any of the Azure clouds. However, there may be some cases where you would want to call the ARM APIs directly. For example:
- You may need to call APIs that are not supported by tooling yet.
- The tools standardize the parsing of the request responses to provide a good usability experience regardless of the service you’re calling. However, advanced users may require a different processing of this response based on their scenario.
- The Azure SDKs are not available in the language of your choice and so you need to make direct REST calls to the ARM API.
For such scenarios, this blog will detail the process of making Authenticated API calls to the Azure Resource Manager. For the purposes of this blog we will use the ARM instance in Azure Stack Hub, but the process is the same regardless of whether you authenticate to Public Azure, any of the regional clouds or Azure Stack Edge.
This blog will help you get boots on ground quick and get started with calling ARM.
Note:
- This post focuses on Azure Stack Operators and the Admin ARM in Azure Stack Hub, but know that it’s the same process for the User ARM as well.
- This post will use Postman as a way to show the API calls. You can use the code generation part of the tool to generate the calls in a variety of languages.
Pre-Requisites:
- Create a Service Principal in Azure and give it the right level of RBAC privileges on your Azure Stack Hub installation. Following this documentation will get you through it.
Note: this post will use Service Principal with a secret.
- Download and install Postman. We’re going to assume some level of familiarity with Postman here to the extent of being able to modify values and being able to send requests.
Setting up the Requests and Environment Variables in Postman
Download the API requests and Environment Variables.
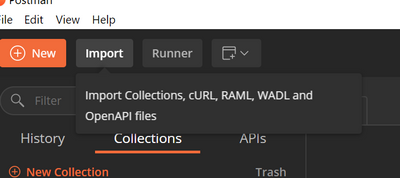
Import the API requests into postman using the import wizard.

Click on Upload files and select both the Azure Stack – Admin ARM REST.postman_collection.json and Azure Stack – Admin ARM REST.postman_environment.json files. This will set up the necessary requests and the environment variables needed for you to follow along.

Make sure you have the API request collection imported on the left nav. To see the Environment variables, click on the dropdown on the top right.

Configure your Environment
Before you can start communicating with your Azure Stack Environment, you need to know a couple of things:
- The URL of the ARM endpoint for that Azure Stack . As an Azure Stack Operator, you interact with he Admin ARM which is typically at https://adminmanagement.{region}.{fqdn}
- The Azure Active Directory Tenant ID – the tenantID of the Directory that you’re going to log into using the Service Principal
- The Service Principal credentials (App ID and Secret) that you’re going to use to authenticate to that ARM endpoint
You can enter these values in the Environment setup in Postman. Click on the Manage Environments icon and Select the Azure Stack – Admin ARM REST environment.


Replace the “Current Value” field for all the variables with the values from your environment.

The Theory
Before we start executing the postman requests, let’s quickly see an overview of the steps that need to be done:
- Discover the endpoints for the Azure Stack Hub – We’ll need a few endpoints other than ARM to interact with the cloud (e.g. the authentication/token endpoint where you need to go to get a token, the audience to get the token for etc.). Fortunately, these are available to us through an unauthenticated API on ARM itself, so the first step is to call that API and get the values.
- Get the AAD or AD FS Token endpoint by looking at the Open Id configuration – I’ll not get into details here about OpenID, Identity tokens and Access tokens etc. but know that the token endpoint is where you go and provide your credentials and get a token back after authentication. You will send this token to whichever application you are interacting with (ARM in this case) for it to authorize you and permit you to call it’s APIs
- Authenticate with the identity system – As mentioned above, you will need to send a request to the Token endpoint of the identity system and present your credentials (SP ID and secret), and the target application (audience) you’re looking to interact with. If all the information you provided matches, the Identity System will now issue a token in response to this request.
- Make an authenticated request to the necessary ARM API – You can now call the ARM APIs by passing the token as a Bearer token in the header of the request. ARM will receive the token and verify if you have access to the API you’re calling and will respond with the right value as appropriate!
Now you’re ready to call the ARM endpoint and have authenticated interactions with the Cloud!
Note: Make sure the right Environment is selected in Postman before you execute the requests below.
This is one of the common causes for failure in following this guide.

Execute Endpoint Discovery
This will send a request to {{adminArmEndpoint}}/metadata/endpoints?api-version=2015-11-01 with the adminArmEndpoint value being the one you set up in the Environment.
You will get the following response back from ARM.

Using the “Tests” functionality in POSTMAN, we’re creating additional environment variables using the values in the response. The most important ones are the ARM Audience and the loginEndpoint. These variables will be used for subsequent requests.

Execute AAD Token Endpoint Discovery
This step will send a call to the AAD or AD FS endpoint discovered in the previous step to fetch the actual token endpoint where we will need to send our credentials. The token endpoint can be read from the “Open ID connect Configuration” for that Identity system.

We will again use the Tests to save this into a new environment variable.
Authenticating with the Identity System and getting a token
Execute the Authenticate Service Principal request next and make sure that the service Principal ID and secret are set in the environment. This will send a request to the token endpoint discovered in the previous step along with the credentials and the ARM audience inferred from the endpoint discovery step.

Assuming your credentials are correct and you do have the permission to request a token, you will get the access token back in the response as seen above. Using Tests, we will store this token in a new variable inside the environment.
At this point you have everything you need to interact with ARM! The first thing you would need to know is the subscription ID – in this scenario, the operator would need to know the id of the Default Provider Subscription.
Execute Get Default Provider Subscription
This will send a request to the {{adminArmEndpoint}}/subscriptions?api-version=2015-01-06 endpoint. Note that the token is sent as a Bearer token in the Authorization Header of the request.
Note: the number of subscriptions returned in this request is dependent on the number of subscriptions the Service Principal has access to on the Admin ARM. In this case, the Service Principal has access only to the Default Provider Subscription, and so only one will be returned.

Execute Get Location
Following the same template for get subscription, we can also get the default location for that Azure Stack Stamp.

Execute Get namespaces within a subscription
Executing this will send a request to the /providers API which will return all the namespaces and the corresponding resource types and api-versions available under them.

With the information we’ve obtained from the above requests viz. Arm Endpoint, subscriptionID, location, namespaces, resource types and API versions that are available to the subscription, we can compose other requests to ARM. The Postman Request collection has samples of other such API calls you can compose with this information. Feel free to give them a whirl!
Resources
Here are some resources that do a great job in providing you an overview of ARM and how to interact with it.
- This article provides a great overview of ARM and its placement in the overall Azure Architecture.
- This is a good doc with details on authenticating and calling Azure Resource Manager on Azure Stack Hub. It provides a detailed description of how to interact with Azure Stack Hub
- As always, check out the Azure API reference.
For learning more about operating an Azure Stack Hub, check the https://github.com/Azure-Samples/Azure-Stack-Hub-Foundation-Core which includes videos, slides, and workshops.
Brought to you by Dr. Ware, Microsoft Office 365 Silver Partner, Charleston SC.

Recent Comments