This article is contributed. See the original author and article here.
From the perspective of Day 2 Operations – customers can use the AKS Periscope tool / tooling to collect and export logs after an initial diagnostic run. This projects has recently been released as part of the VS Code extension furthering easing the usage and improving operational efficiency.
What exactly can AKS Periscope do ?
Capture logs and metrics + Generate diagnostic signals
Full feature is here.
AKS Periscope as part of the AKS Extension for VS Code
Here is a quick excerpt on utilizing the AKS Periscope after you have the AKS extension installed.
Source: Link
——–
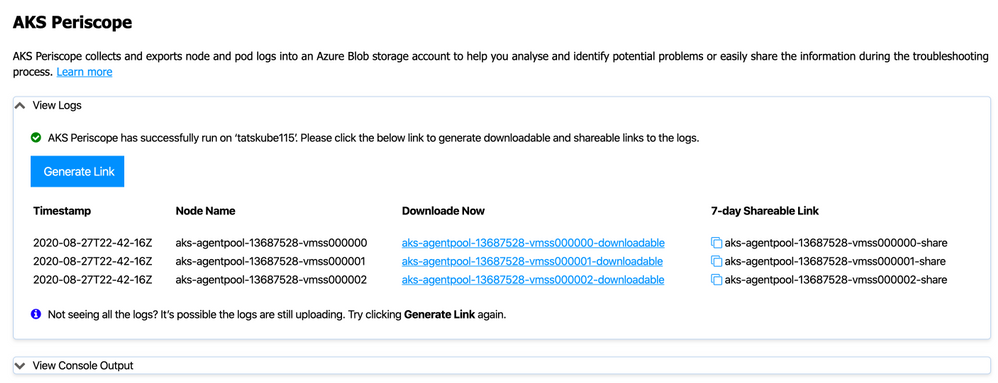
AKS Periscope
Right click on your AKS cluster and click on Run AKS Periscope to collect node and pod logs for your AKS cluster and to export them to an Azure storage account. Upon selecting the option, a web view will load providing you the option to generate a downloadable link for the collected logs as well as a shareable link with 7-day expiry.

Configuring Storage Account
Running the AKS Periscope requires you to have a storage account associated with the Diagnostic settings of your AKS cluster. If you have only one storage account associated with the Diagnostic settings of your AKS cluster, the collected logs will be stored in the associated storage account by default. If you have more than one storage account associated with the Diagnostics settings of your AKS cluster, then the extension will prompt you to choose the storage account for saving collected logs. If you don’t have a storage account configured in the Diagnostic settings, please follow these instructions to enable it.
Navigate to your AKS cluster in the Azure Portal.
Click on Diagnostic Settings under Monitoring in the left navigation.
Click on Add diagnostic setting.
Enter a name, such as myAKSClusterLogs, then select the option to Archive to a storage account.
Select a storage account of your choice.
In the list of available logs, select the logs you wish to enable.
Note: The incurred cost is subject to your storage account usage and Azure Storage Policy.
When ready, select Save to enable collection of the selected logs.
————
Brought to you by Dr. Ware, Microsoft Office 365 Silver Partner, Charleston SC.

Recent Comments